Event Management
Run an event end to end: the registration page, the emails your guests receive, the waitlist, check-in on the day, and the follow-up afterwards.
What it's for
Events usually mean juggling a registration page, a spreadsheet of attendees, a handful of emails and a clipboard at the door. Event Management keeps all of it on one page, and because every registration becomes a contact, following up afterwards does not mean re-typing a list.
Before you start
- An email design for your brand, if you want the event emails to look like your other emails. Without one, they use the standard GoodBards design.
- A form, if the default registration form (name, email, company, job title) is not enough.
How to set up an event
- In the sidebar, choose Marketing → Event Management.
-
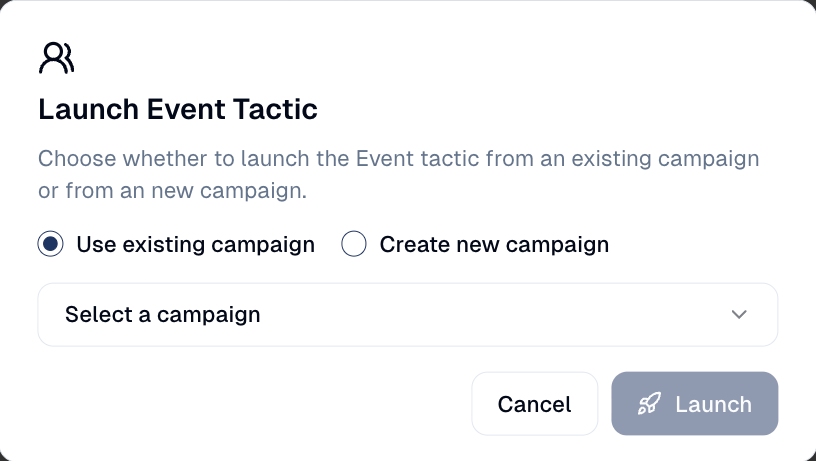
Choose New Event. An event is a campaign tactic, so GoodBards first asks for its campaign: choose Use existing campaign and pick one, or Create new campaign, then choose Launch. Fill in the name, type, date, time and venue.
-
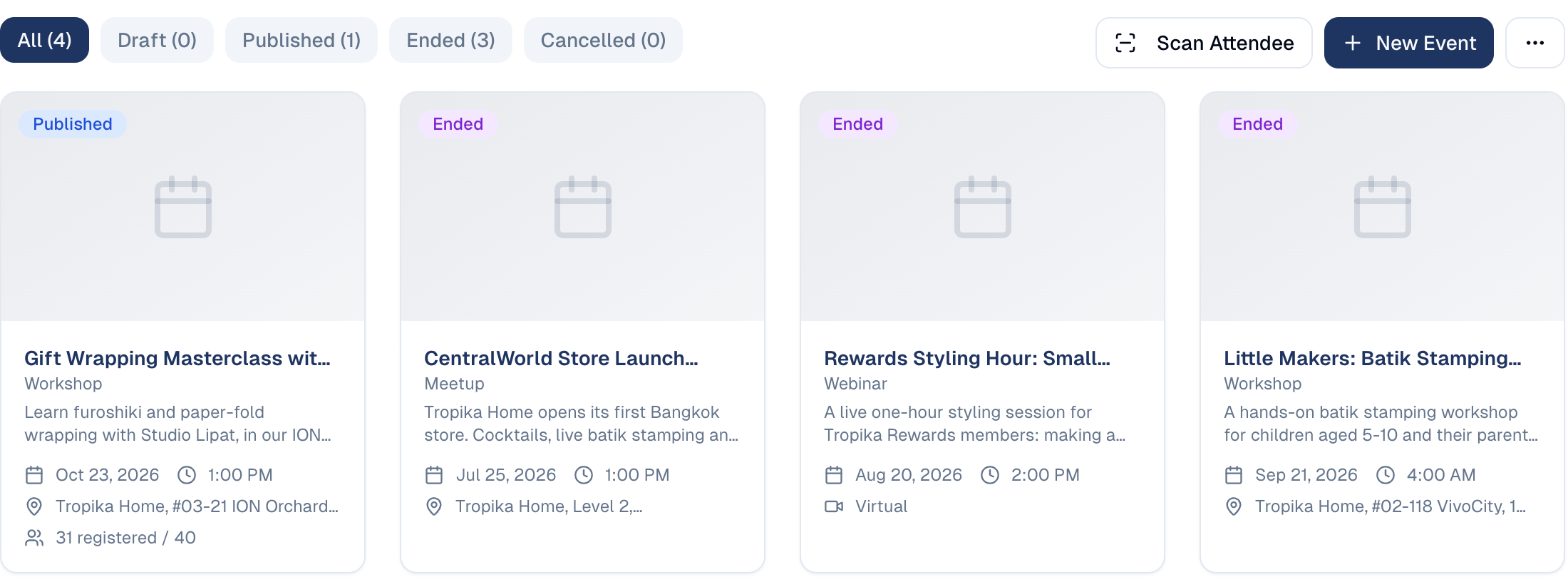
Open the event. Its tabs follow the life of the event, left to right: Overview, Definition, Landing page, Registration, Communications, Attendance, Analytics, Follow-up.
- Work through them in that order.
Everything saves on its own
There is no Save button on the event page: each change is kept as you make it.
Definition: what guests see
The Definition tab holds the cover image, the short and long descriptions, the date and the address. These feed the landing page and every event email: the event name, date and place in your emails always come from here. Change them here, never inside an email.
Landing page
The Landing page tab shows the page guests register on. It is built from the Definition tab, so it is always up to date.
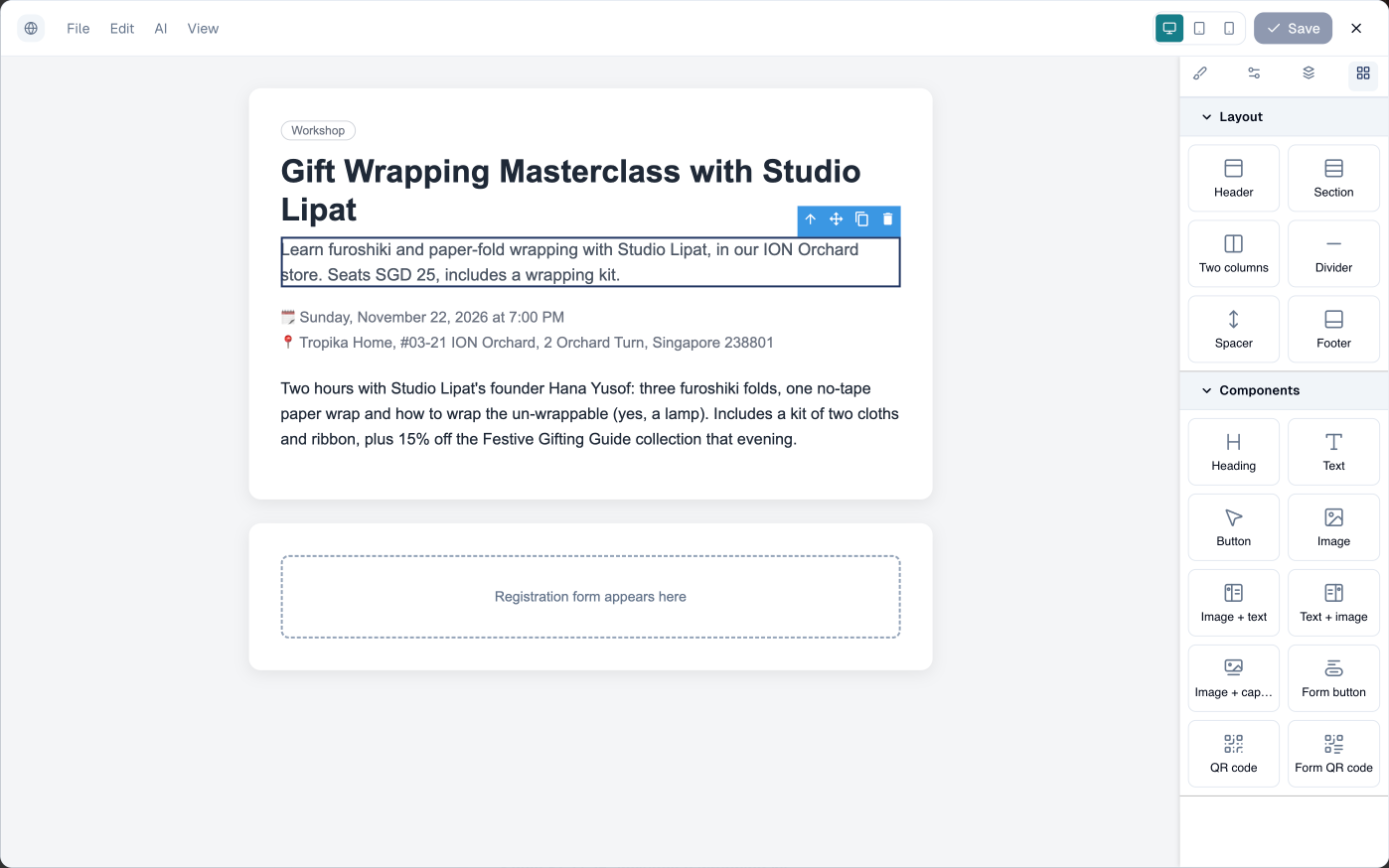
To change its layout, choose Duplicate to customize. You get your own copy in the visual editor.
A customized page is a copy
Once you customize the landing page, later changes on the Definition tab are no longer copied into it. Update the page yourself, or go back to the default.
For the editor, the registration form block and switching back to the default, see The event page.
Registration
- Settings: capacity, the registration window, Require Approval, and the Waitlist.
- Registration form: keep the default form, or choose Create new or Duplicate existing to use one of your own. Edit form opens it.
- Contact registration: which form fields fill the contact record (email, first and last name, phone, job title, tags, custom fields). See Forms.
- Registration emails: one email for each situation a guest can be in (see below).
- Confirmation message: the text shown on the page after registering.
The last four blocks are folded; choose a title to open it.
Registration emails
Each email is sent automatically when a guest reaches that situation. Only the ones your event can produce are listed:
| Sent when | Listed when | |
|---|---|---|
| Confirmed | The guest has a seat. Carries the check-in QR code and calendar links. | Always |
| Request received | The guest registered and waits for your approval. | Require Approval is on |
| Approved | You approved the request. | Require Approval is on |
| Declined | You declined the request. You can turn this one off. | Require Approval is on |
| On the waitlist | The event was full; the guest joined the waitlist. | Waitlist is on |
| Spot opened | A seat freed up and the guest moved off the waitlist. | Waitlist is on |
Editing an email
Every event email (the registration emails above, and the invitation and reminders under Communications) works the same way. The card shows the email as guests receive it, inside your event design.
The full guide
Event emails covers every email of an event, how to put your brand on all of them at once, the list of fields you can insert, and how to send an email of your own instead.
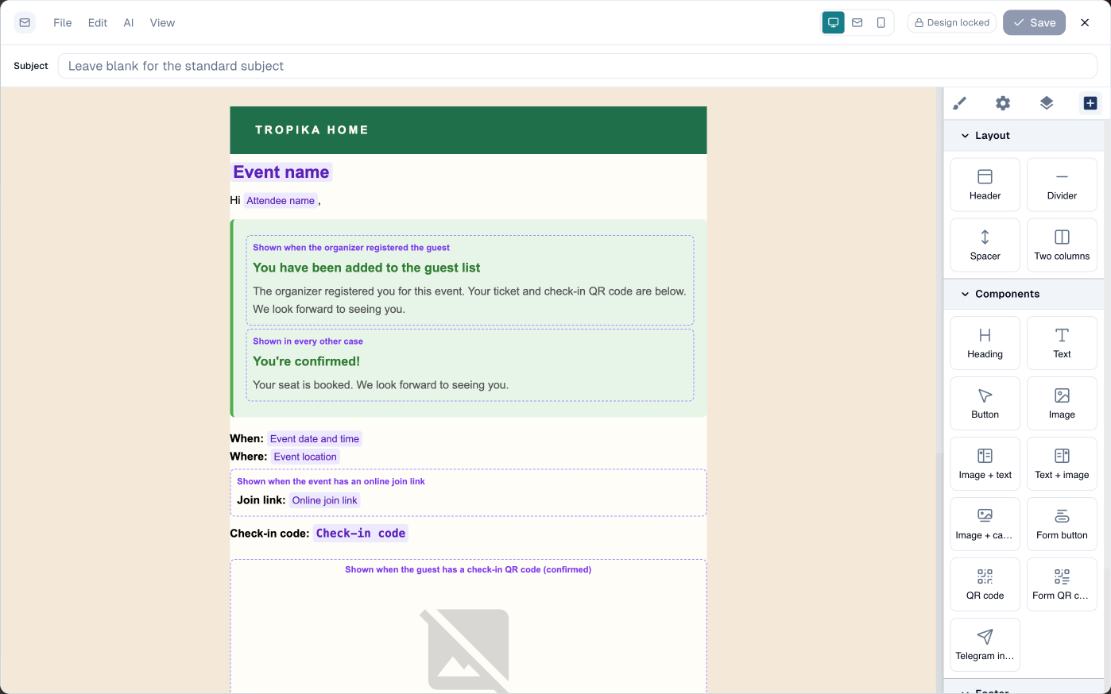
- Choose the preview, or Edit. The editor opens, with the Subject under the menu bar. The View menu switches between Visual editor, HTML code and AI assistant; see Editing an email.
- Change the text, then choose Save. The card now says Your own version of this email.
- To go back, choose Reset to standard.
In the Visual editor:
- Purple dashed boxes are parts only some guests see. The title says who, for example Shown when the guest has a check-in QR code. Edit the text inside; the box itself cannot be moved or deleted, so the email keeps working for every guest.
- Purple chips, such as Attendee name or Event location, are filled in for each guest when the email is sent. To add one, place your cursor in a text and pick it from Insert field… in the text toolbar. Do not type them by hand.
To send an email you built under Emails instead, choose Use one of my emails instead under the card.
Testing an email
Every event email has a Send Test Email button under its card: the invitation, the reminders, the registration emails and the follow-ups. It works at any time, even while the event is a draft.
- Choose Send Test Email. The address is filled in with yours; change it to send the test to a colleague.
- Choose Send Test, and check the email in that inbox.
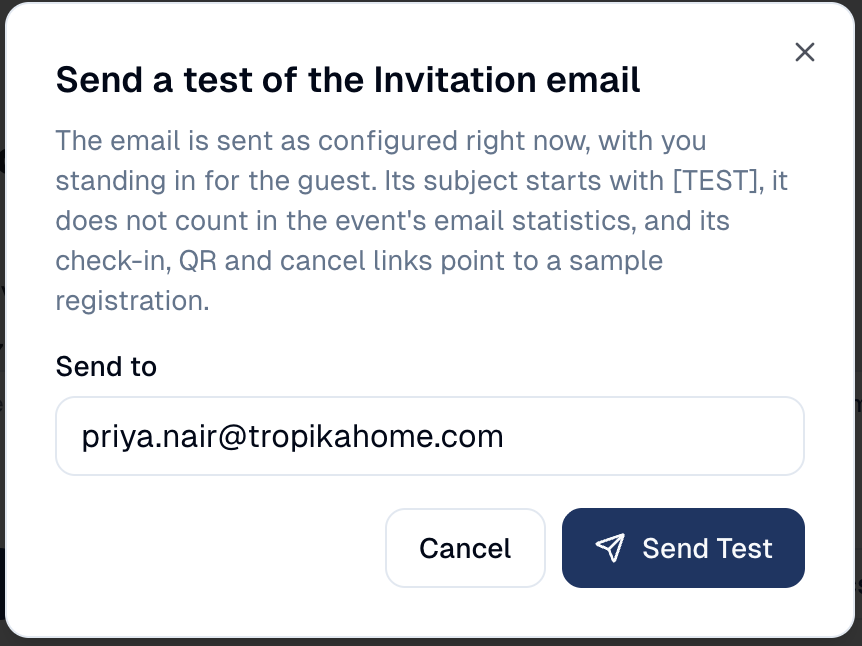
The test is the email as it is saved right now, with your name in place of the guest's. Its subject starts with [TEST], and it does not appear in Sent emails or in the email metrics.
The registration link in a test is real
The check-in, cancel and calendar links in a test belong to a sample registration, so they do not open a real one. The registration link in a test invitation is the real one: if you complete the form, you are registered.
How to send, and see what happened
- On Communications, choose Send Invitations to email your audience, or Send Reminder Now for a reminder.
-
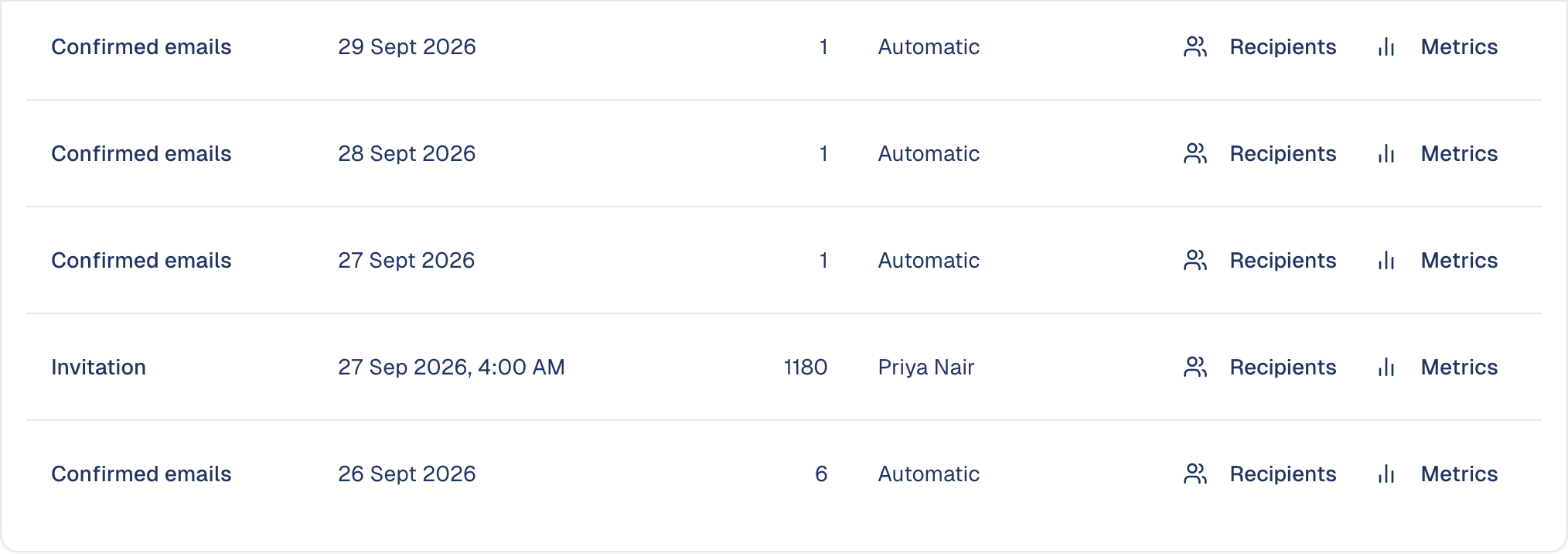
At the bottom of the tab, Sent emails lists every email the event has sent, with the time, the number of recipients and who sent it. Confirmations and other one-by-one emails are grouped per day.
-
Choose Recipients on a line to see who received it, search them, or show the failed ones only. Choose Metrics for opens and clicks.
-
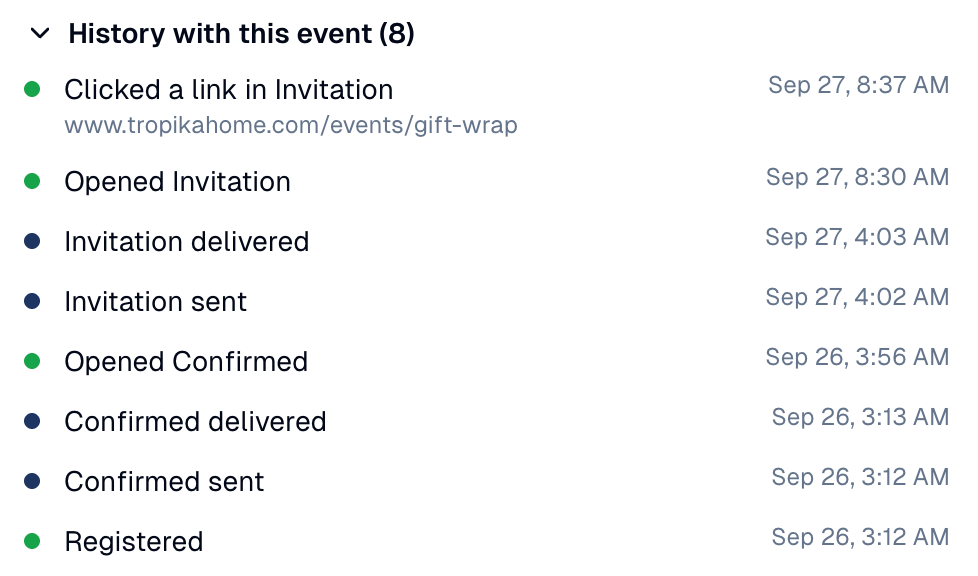
On Attendance, the Latest email column shows the last email each guest received. The eye icon opens the guest's History with this event: what was sent, delivered, opened and clicked.
-
On Analytics, Email Performance shows all the event's emails together or one type at a time, and Export CSV downloads the list.
How to use the waitlist
Turn on Waitlist under Registration › Settings. When the event is full, new registrations join a queue. Choose how a freed seat is given:
- Automatic: the next person in line gets it and is emailed.
- Manual: you choose. On Attendance, use ↑ Promote on a waiting guest. It only works when a seat is free.
How to check people in
On the day, use Scan attendee to check people in. Each guest's confirmation and reminder emails carry a QR code; scanning it records them as attended.
The Actions menu
| Action | What it does |
|---|---|
| Publish / Unpublish | Puts the event page online, or takes it offline. |
| Open public page | Opens the event page as guests see it. |
| Open / Close registration | Starts or stops accepting registrations, without touching the event itself. |
| Send invitations | Emails the invitation to the event's audience. |
| Scan attendee / Kiosk mode | Checks guests in. See Check-in and badges. |
| Export attendees | Downloads the guest list as a spreadsheet. |
| End event | Ends it now; guests not checked in become absent. Ended events reopen with Reopen if you ended one too early. GoodBards also ends an event on its own when its end date passes. |
| Cancel event | Cancels it and emails every registered guest. |
Cancelling an event cannot be undone
Cancel event emails every registered guest at once. To stop new registrations only, use Close registration instead.
To run an event again, duplicate its tactic on the campaign page: the event comes with it. See Duplicating a tactic.
The Overview tab also has quick actions: Open Public Page, Copy Registration Link and Preview Invitation Email.
Good to know
Publish before you share the link
A draft event does not accept registrations.
- Declined guests can stay unaware. Turn off the Declined email and nobody you decline is emailed, even when you change a status by hand.
- Cancel with ⊘, not with the status menu. Cancel registration (the ⊘ icon on a row) emails the guest and offers the seat to the waitlist. Changing the status from the menu only corrects the list.
- Follow up while it is fresh. Attendees are contacts, so the Follow-up tab can email everyone who came, everyone who did not, or the people you invited who never registered.
Still stuck? Contact support.