Run an event from start to finish
From the first invitation to the thank-you email: everything an in-person, online or hybrid event needs, in the order you will do it. Allow about an hour to set up your first event; later ones go faster because you can duplicate them.
What it's for
An event touches every part of your marketing: your audience, a landing page, a registration form, several emails, check-in at the door and the follow-up. GoodBards keeps all of it on one event page, and every guest who registers becomes a contact you can market to afterwards.
Before you start
- Your Brand Kit, so the landing page and emails look like you. See Brand Kit.
- The people you will invite, as a segment or a mailing list. See Contacts.
1. Create the event
-
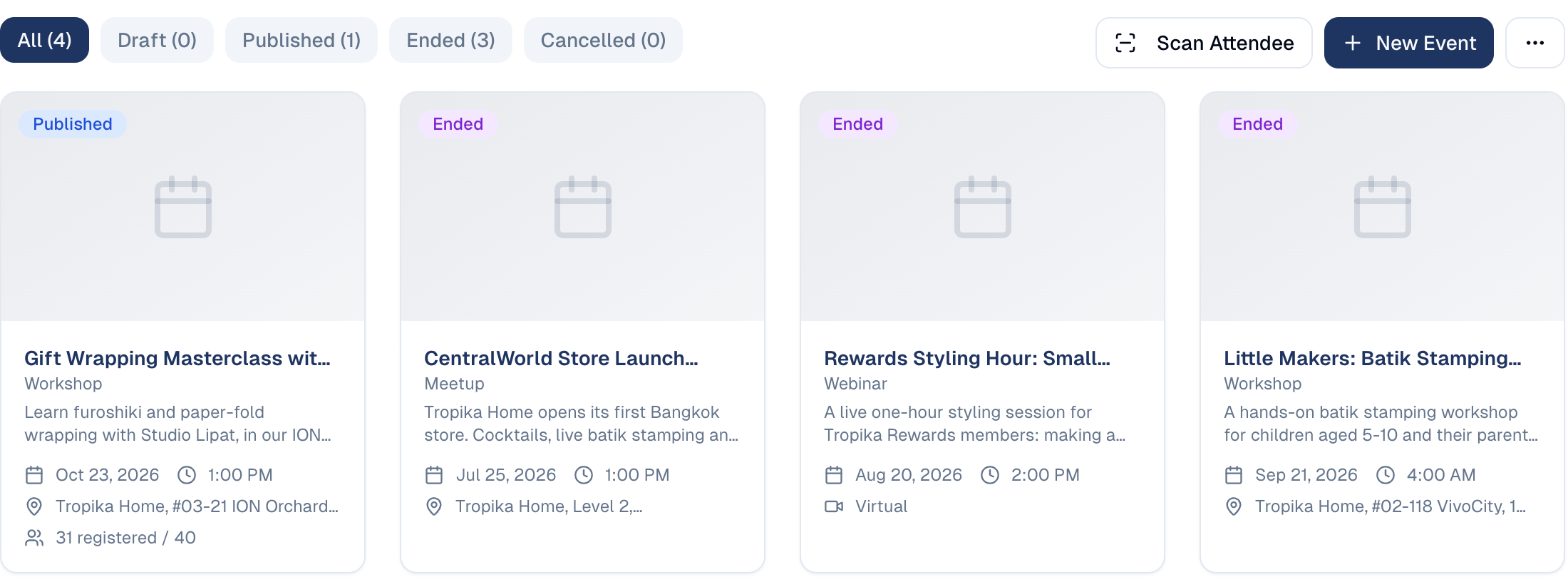
In the sidebar, choose Marketing → Event Management. Your events are listed as cards, with their status, date, place and registrations.
-
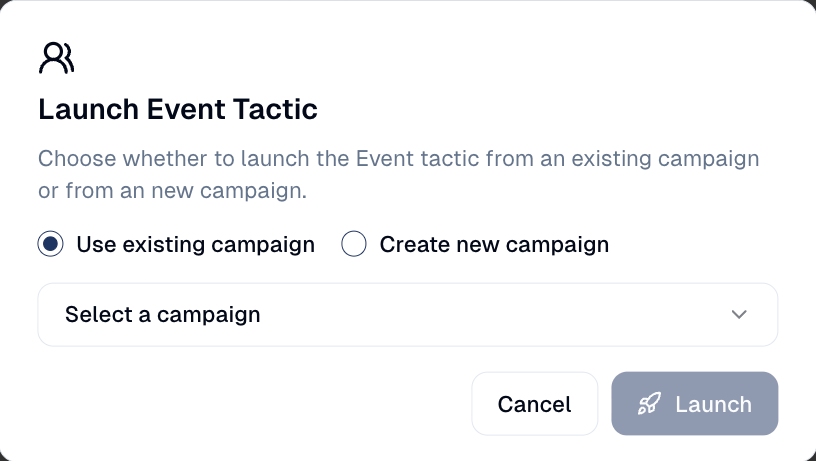
Choose New Event. Pick the campaign it belongs to (Use existing campaign) or Create new campaign, then choose Launch. Give the event a name, a date and time, and a place.
-
Open the event. It starts on the Overview: registrations against capacity, invitations sent, days to go, and quick actions such as Copy Registration Link. The tabs follow the life of the event, from left to right.
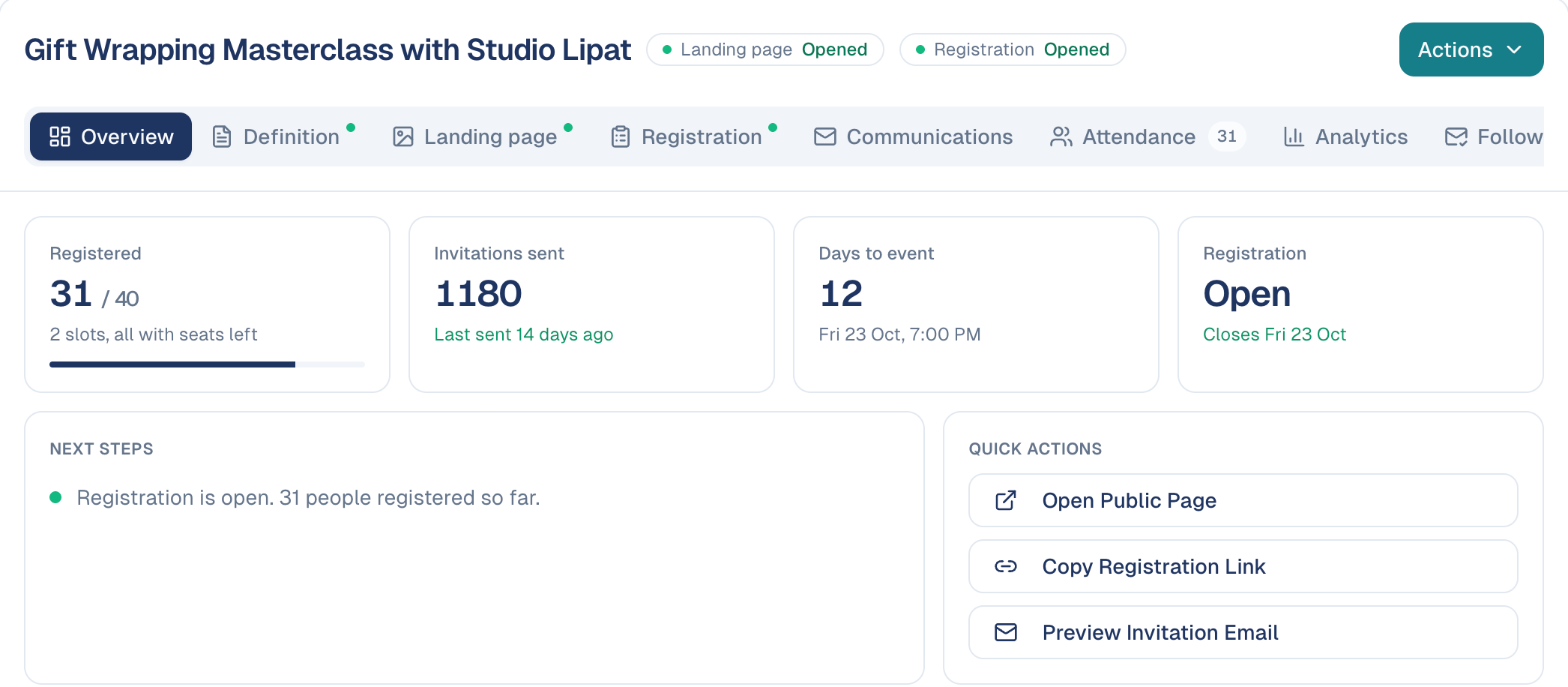
The dots on a tab show it is set up.
Everything saves on its own
There is no Save button on the event page: each change is kept as you make it.
2. Describe the event
On the Definition tab:
-
Set the Event Type, the Format (in person, online or hybrid) and the Visibility.

-
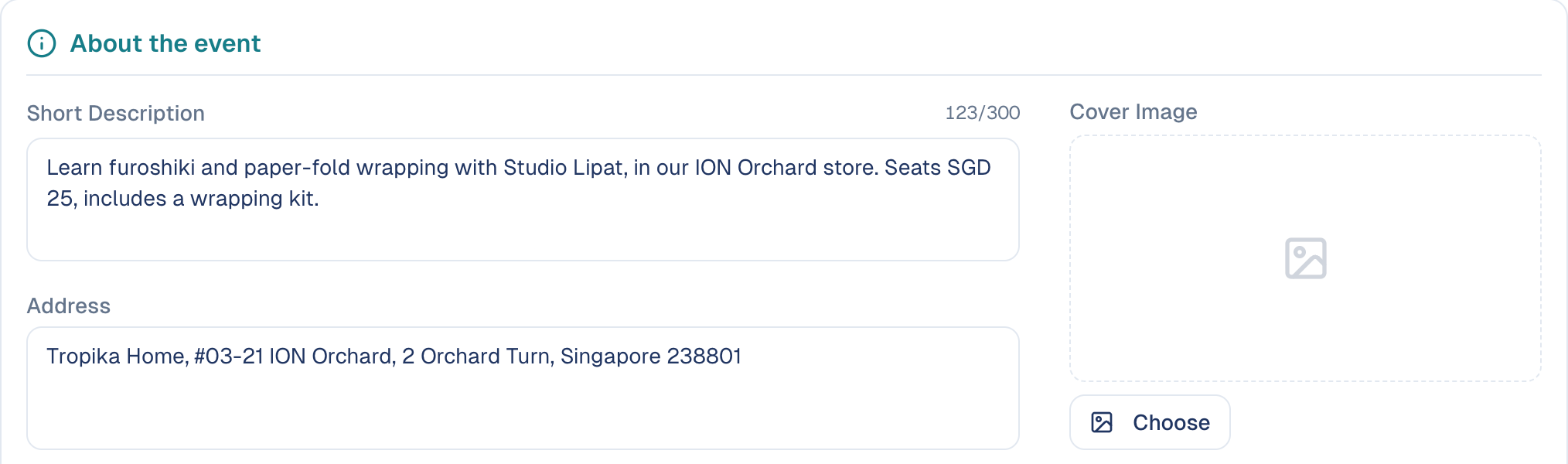
Under About the event, write a Short Description, the Address, and choose a Cover Image. These appear on the landing page and in every email.
-
For an online or hybrid event, add the Join link. Only confirmed guests receive it.
Change event details here, never inside an email
The event's name, date and place in every email come from this tab, so the emails stay right when the event moves.
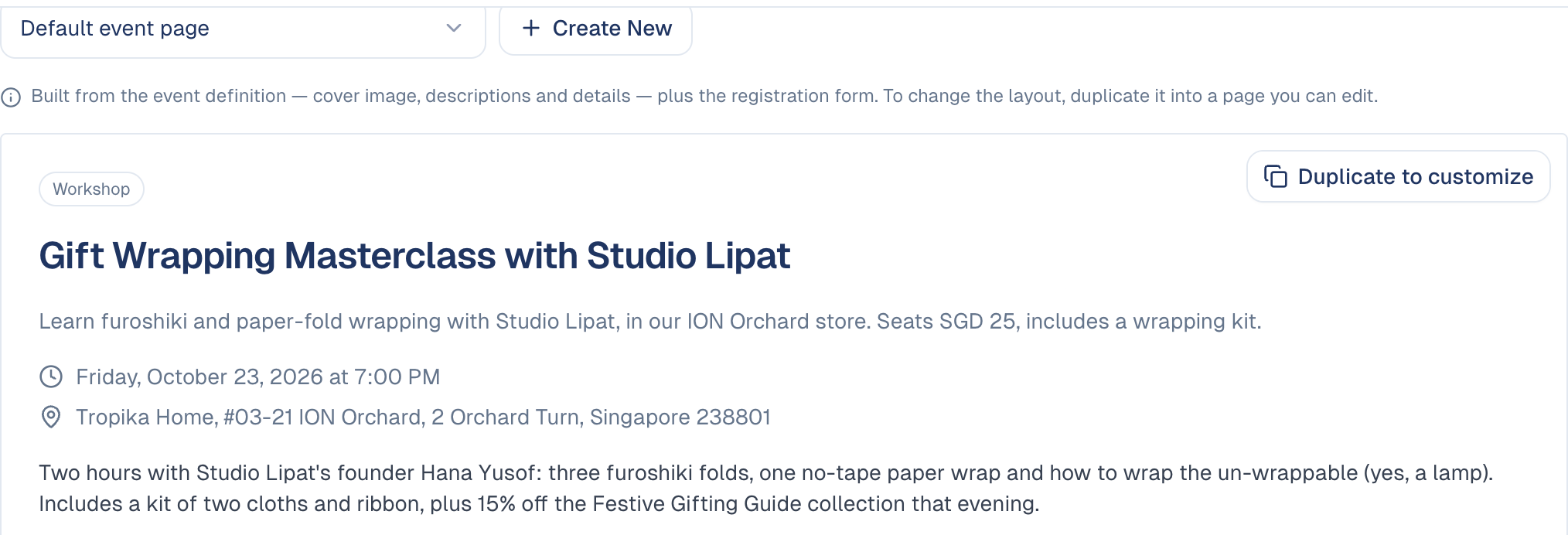
The Landing page tab shows the page guests register on, built from what you just wrote. To change its layout, choose Duplicate to customize.
3. Prepare the registration
On the Registration tab:
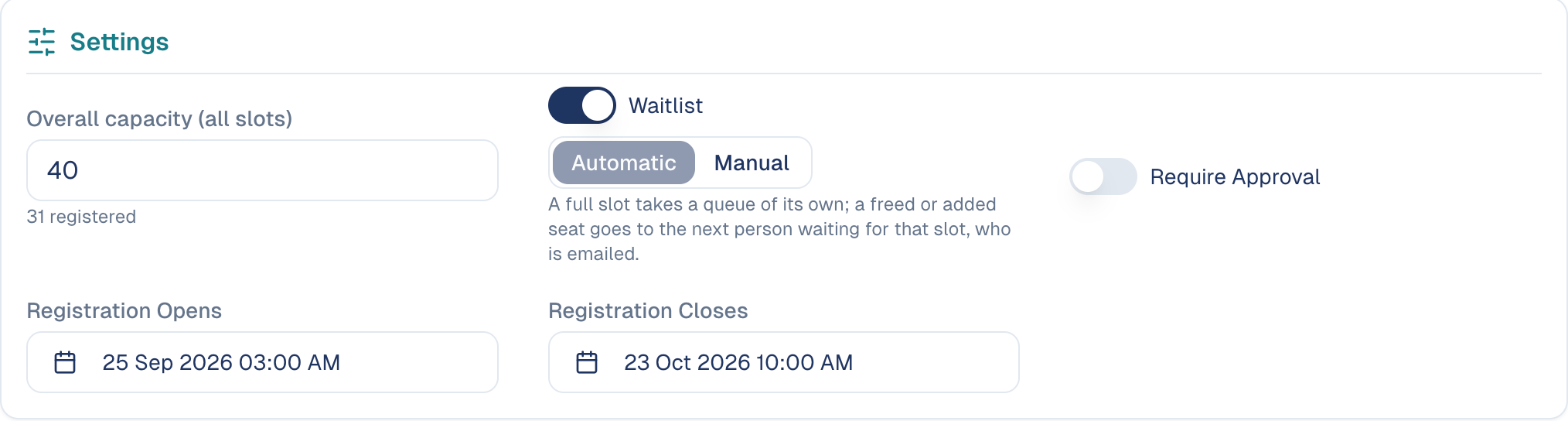
- Under Settings, set the Max Capacity, when registration opens and closes, and whether to Require Approval.
-
Turn on the Waitlist if the event can fill up, and choose how a freed seat is given: Automatic (the next person in line is seated and emailed) or Manual (you choose).
-
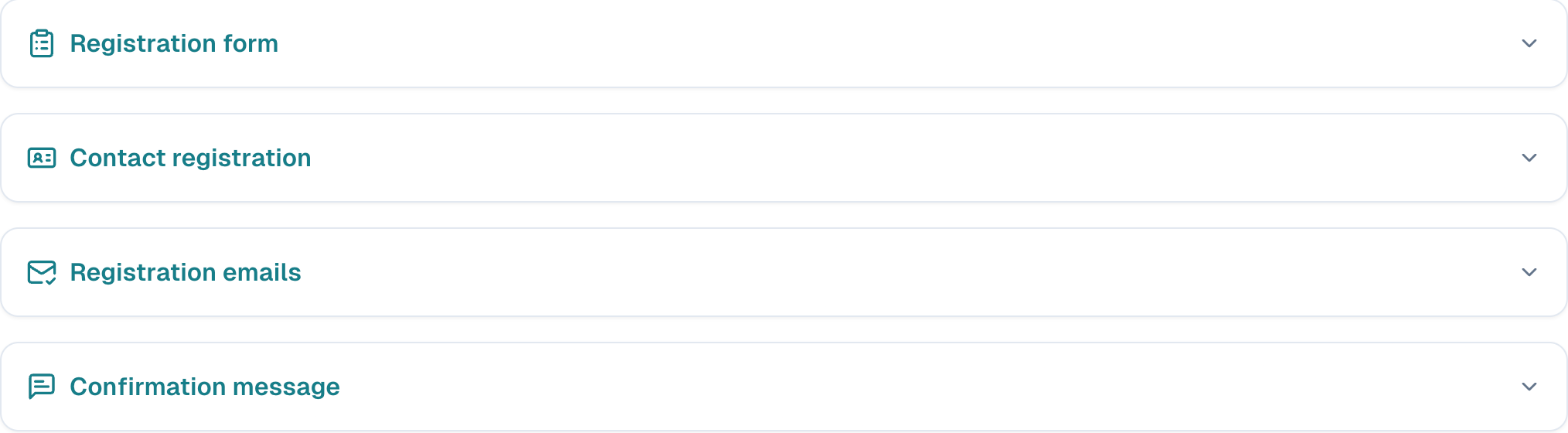
The blocks below are folded; choose a title to open one.
-
Under Registration form, keep the default form (name, email, company, job title) or choose one of your own. See Forms.
-
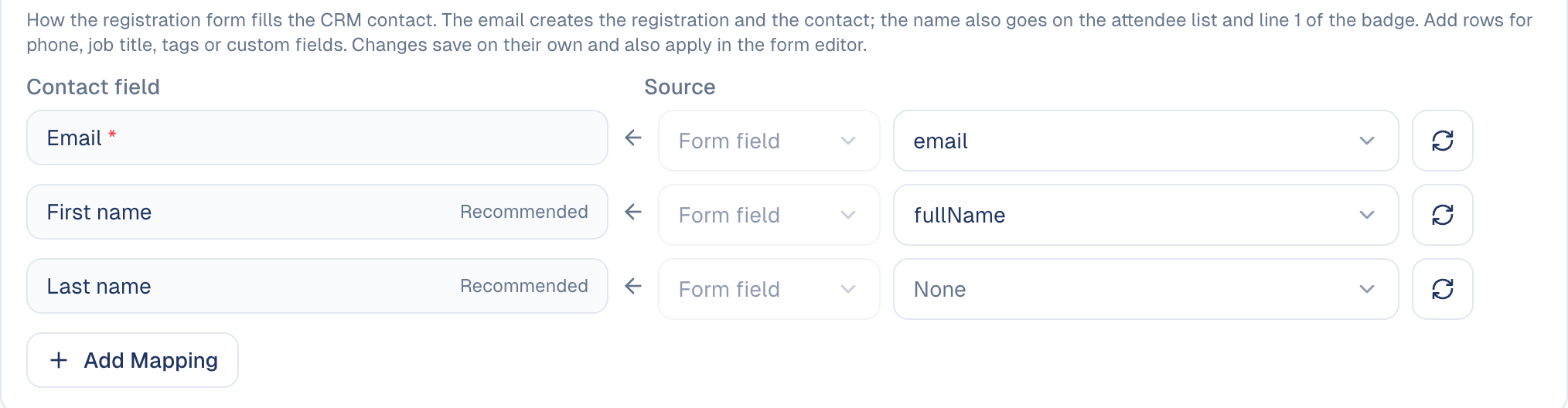
Under Contact registration, check which form fields fill in the contact: email, first and last name, and anything else you want to keep with Add Mapping. Changes save on their own.
4. Set up the emails
Each guest receives the right email for their situation automatically. Under Registration emails, the list shows the emails your event can send, and grows when you turn on approval or the waitlist.
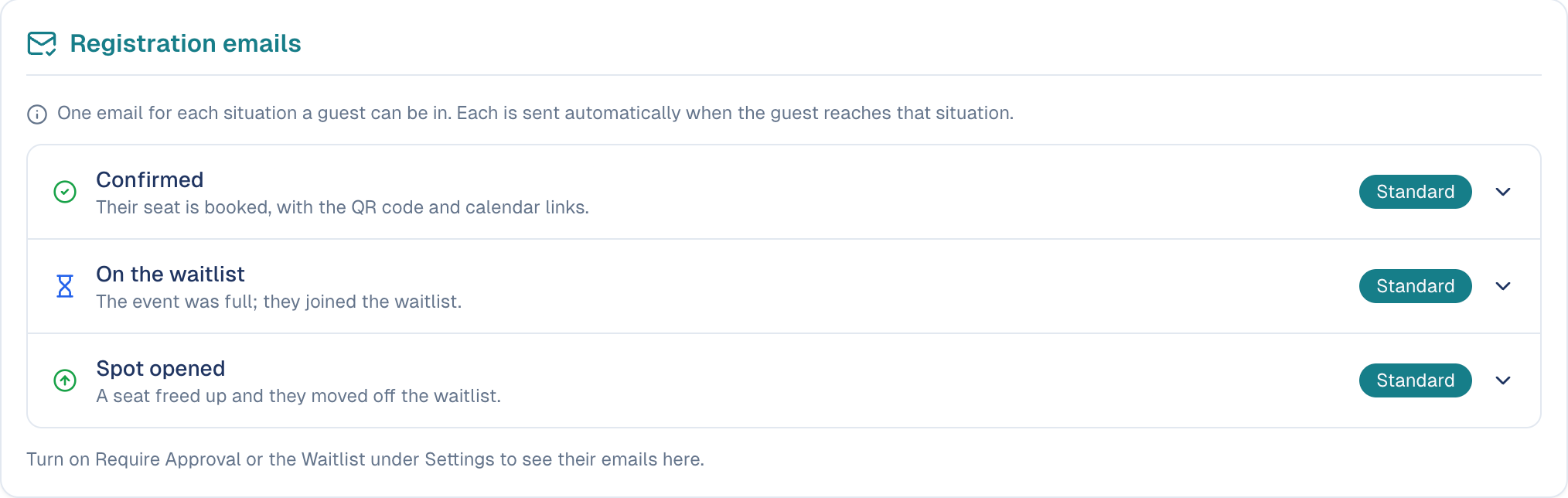
To change one:
- Open it and choose Edit on the preview.
- Change the Subject at the top and the text in the editor, then choose Save.
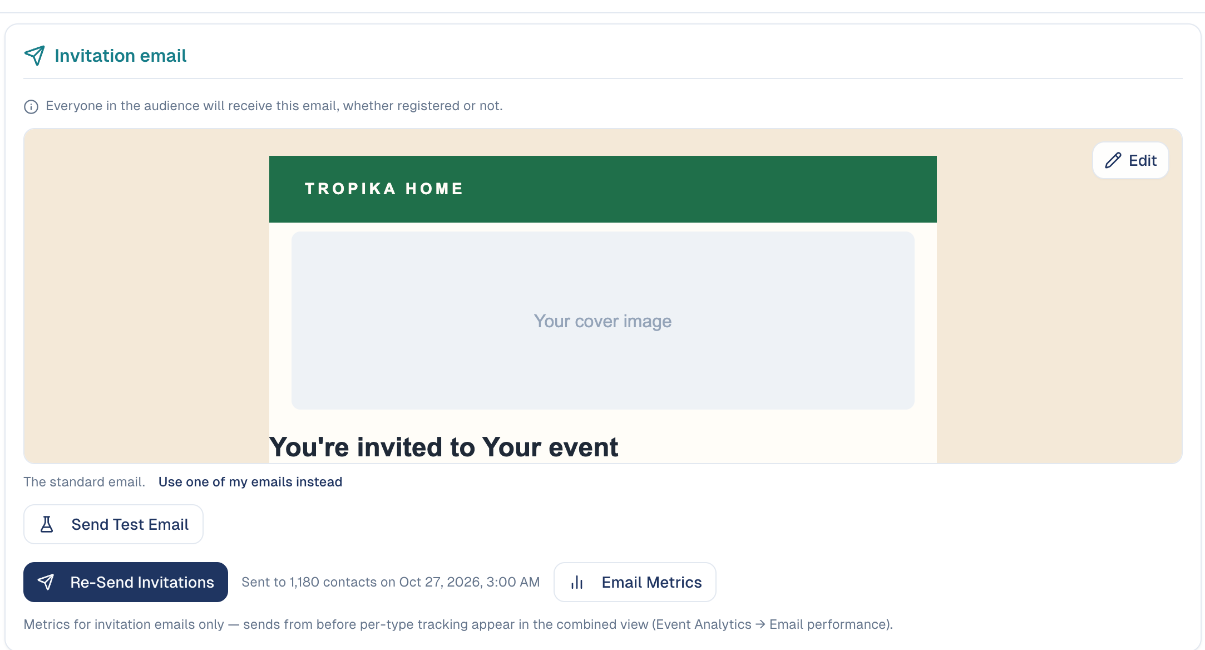
The invitation and the reminders work the same way, on the Communications tab. See Editing an email.
Test before anything goes out
Choose Send Test Email under an email to receive it in your own inbox. See Testing an email.
5. Invite your audience
- On the Communications tab, under Invitation email, choose the audience to invite.
- Choose Send Invitations. You can also send them from the Actions menu.
- Add Registration reminders for people who have not registered yet, and Event reminders for guests, for example one day and one hour before.
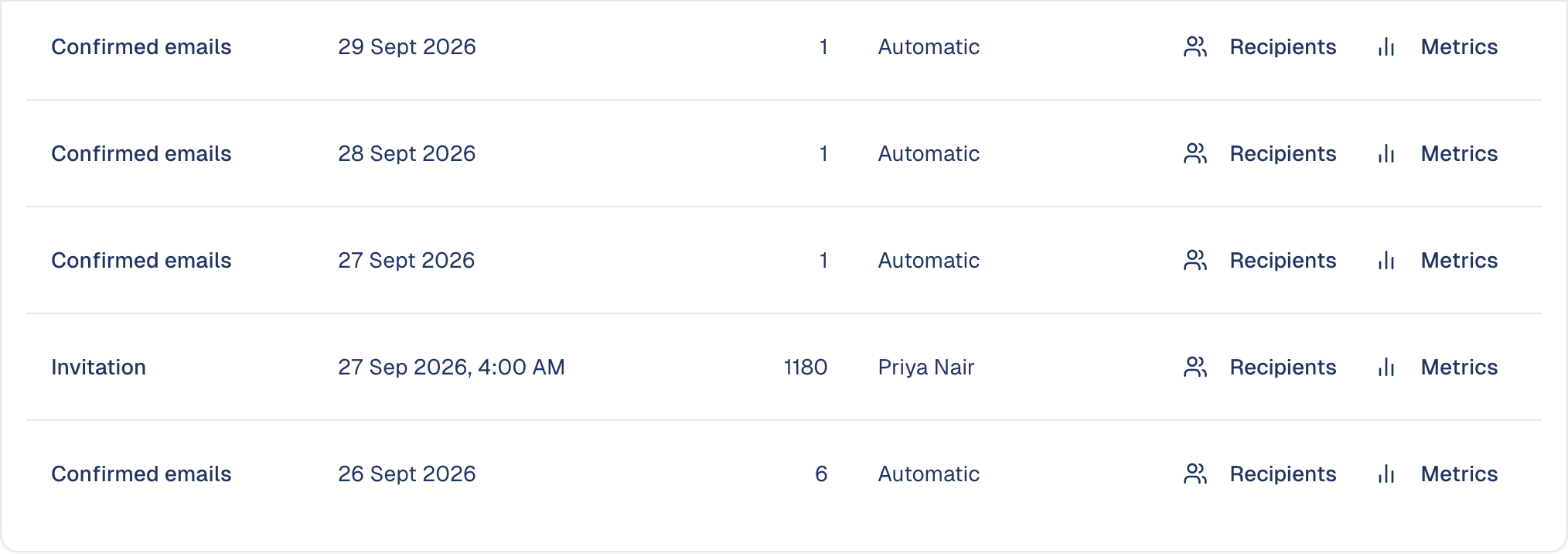
At the bottom of the tab, Sent emails lists every email the event has sent, with the number of recipients.
Promote it on social media
On the Overview tab, Promote On Social writes the event's posts for you: the announcement, a reminder, a last call and a happening today post, from the event's own facts and with its cover image, for the social channels of the campaign.
The posts arrive as drafts on the campaign's social tactics, each with a suggested date counted back from the event.
Nothing is published until you schedule it
The drafts wait for you. The button is not available for private events or events without a date.
See also Social Post.
Show your events on your website
In the sidebar, choose Marketing → Event Management. The menu at the top right offers Open public page (the page listing all your public events) and Embed form. The embed gives you a code to paste into your website, with a light, dark or automatic theme and a list or grid layout, so visitors see and register for your events without leaving your site.
6. Manage registrations
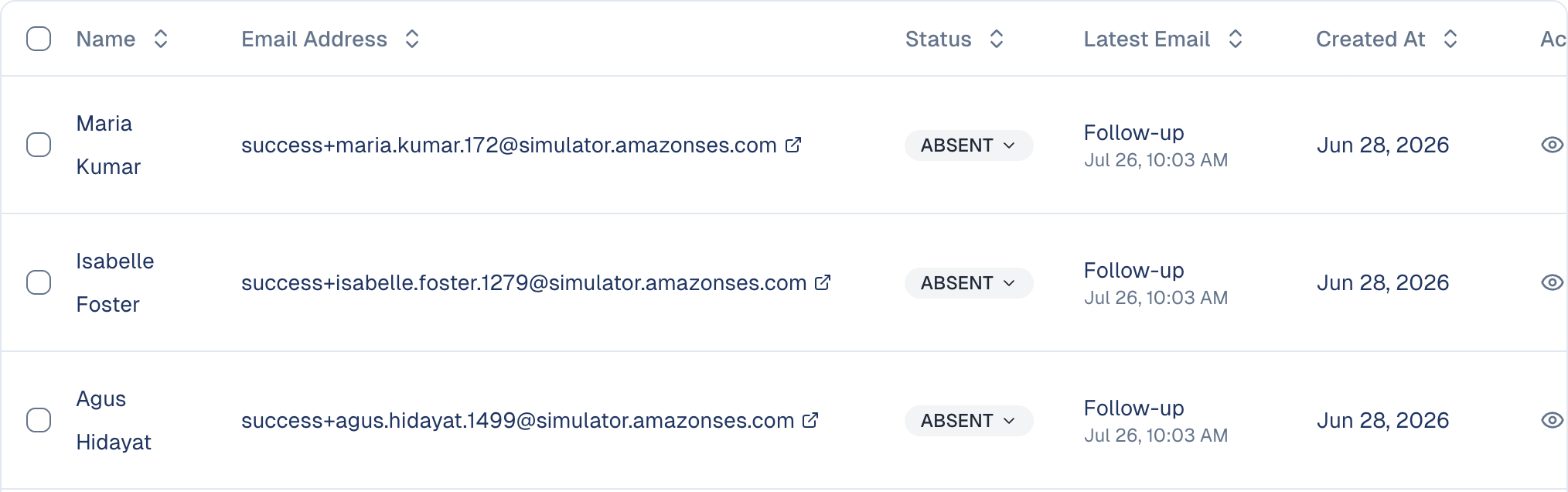
The Attendance tab lists every guest, their status and the last email they received.
- Approve or decline requests when approval is on.
- ↑ Promote a waiting guest when the waitlist is in Manual mode.
- Add Attendee to register someone yourself, for example from a phone call.
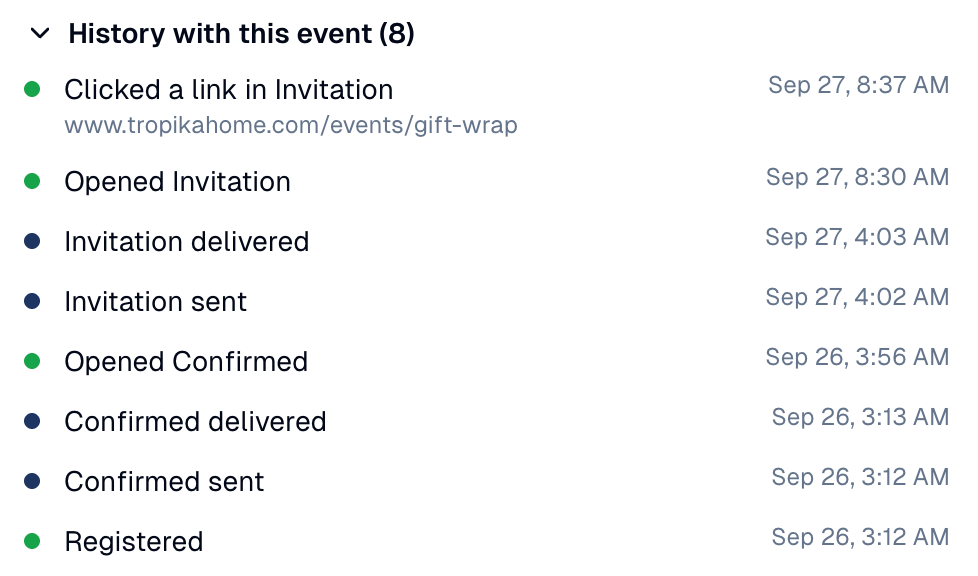
- The eye icon opens a guest's history with this event: what was sent, delivered, opened and clicked. Useful when a guest says they never got their confirmation.
7. On the day
Every confirmed guest has a QR code in their confirmation and reminder emails.
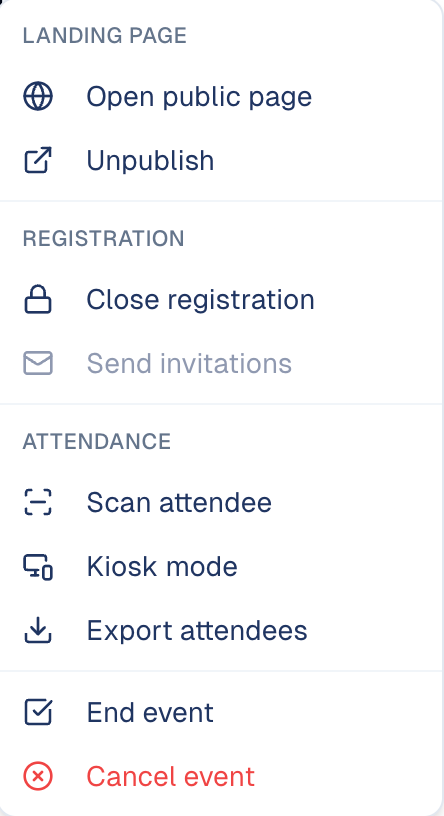
- Open the Actions menu.
- Choose Scan attendee to check guests in with your phone or laptop camera, or Kiosk mode to let them check themselves in at the entrance.
-
To print name badges, set the format under Attendance → Badge, then use the print icon on a guest's row.
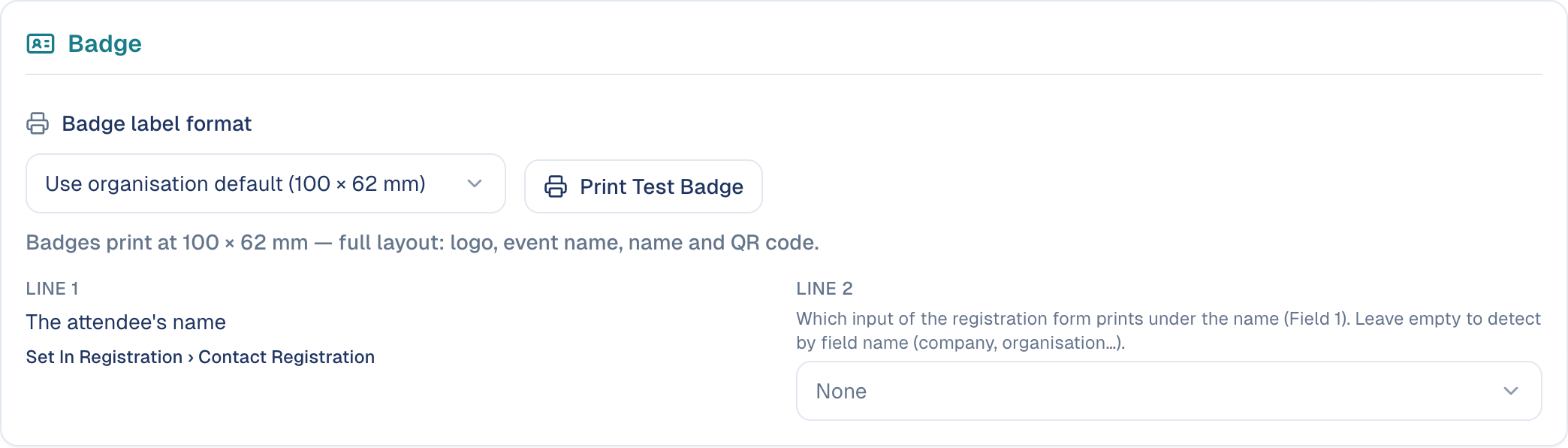
See Check-in and badges for the details.
Extra hands at the door
Invite helpers with the Event host role and tick them under Registration → Hosts: they see this event's guest list and check-in, and nothing else. See Event hosts.
8. Follow up
- When the event is over, choose Actions → End event. Guests who were not checked in are marked as absent.
- On the Follow-up tab, set the email for those who attended, those who did not, and those you invited who never registered. Attach a survey form if you want feedback.
-
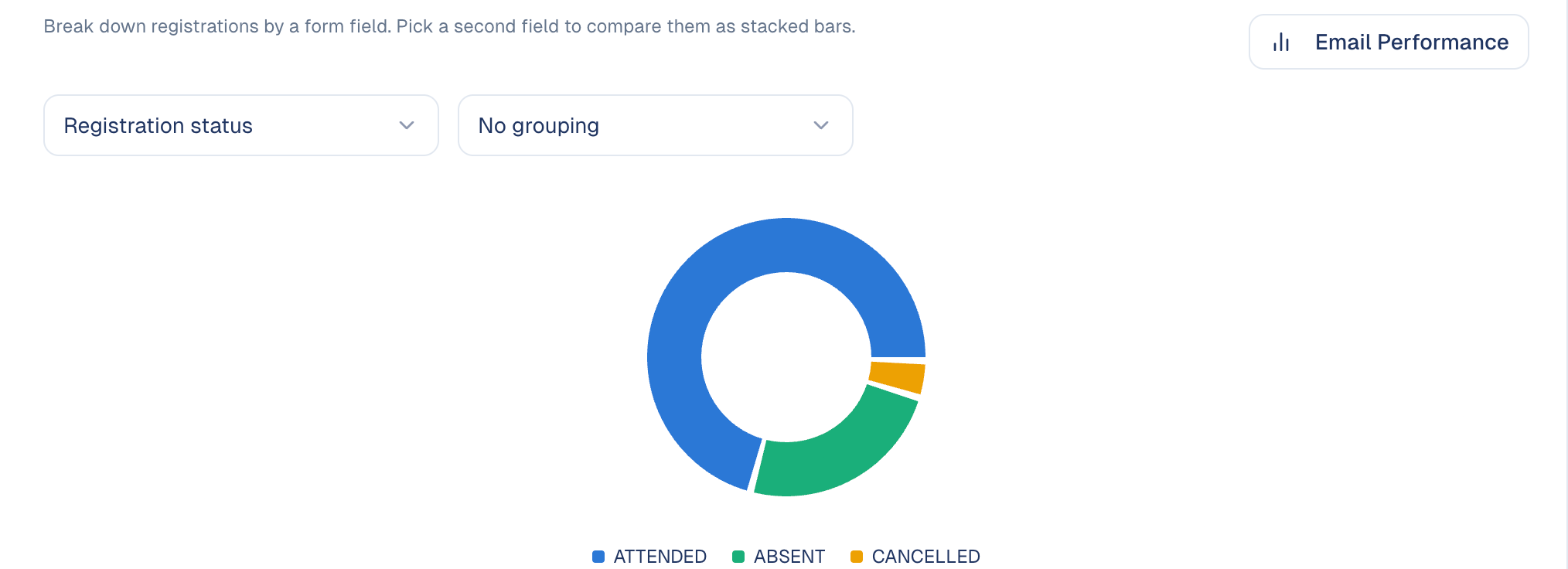
On the Analytics tab, see registrations broken down by status or by any form field, and choose Email Performance to see how every event email did.
-
If you attached a survey to the follow-up, its answers appear on the Follow-up tab as charts per question, with a CSV download.
Cancelling an event
Cancelling an event cannot be undone
Actions → Cancel event emails every registered guest that the event is cancelled. To stop new registrations but keep the event, use Close registration instead.
Good to know
Publish before you share the link
A draft event does not accept registrations.
- Cancel a registration with ⊘, not with the status menu. ⊘ emails the guest and offers the seat to the waitlist; the status menu only corrects the list.
- Every guest becomes a contact. After the event, find them in your audience and follow up with a normal email or campaign.
- Next time, duplicate. Duplicate the event's tactic on its campaign: the settings, emails and form come with it, so only the date and details change. See Duplicating a tactic.
Still stuck? Contact support.