Event emails
The invitation, the reminders, the confirmation and the follow-up: which emails an event sends, how to make them look like your brand, and how to write your own.
What it's for
An event sends a dozen different emails, each to the right people at the right moment. All of them are ready when you create the event. You can leave them as they are, change their look in one place, reword any of them, or replace one with an email you built yourself.
In short
| You want | Do this |
|---|---|
| Your colours and logo on every event email | Choose a design under Definition › Email design. |
| A different wording for one email | Choose Edit on its card, change the text, Save. |
| A completely different email | Choose Use one of my emails instead under its card. |
| To see it before your guests do | Choose Send Test Email under its card. |
Before you start
- An email design with your logo and colours, if you want the event emails to look like your other emails. See Email designs.
- The event's Definition tab filled in: the event name, date, place and description in every email come from there.
The emails of an event
| Who receives it | When | Where to find it | |
|---|---|---|---|
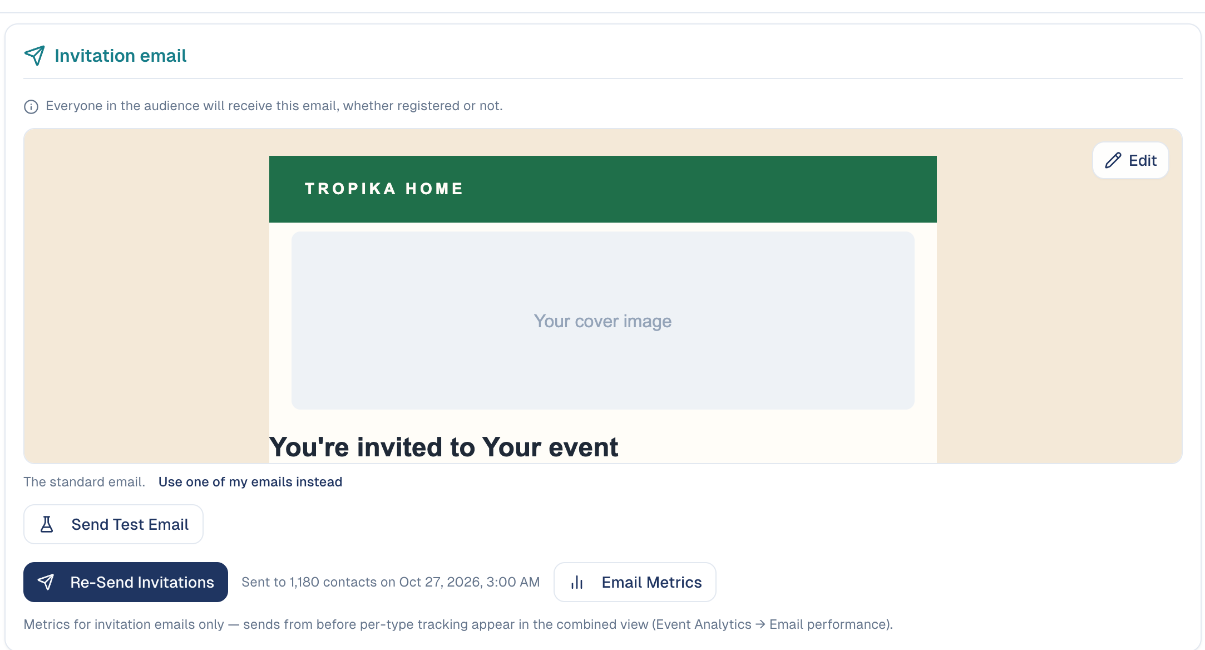
| Invitation | Everyone in the event's audience | When you choose Send Invitations | Communications |
| Registration reminders | People in the audience who have not registered yet | On the days you schedule, or with Send Reminder Now | Communications |
| Event reminders | Registered guests only | A number of days or hours before the event | Communications |
| Registration emails (Confirmed, On the waitlist, Spot opened…) | The guest concerned | Automatically, when the guest reaches that situation | Registration › Registration emails |
| Follow-up (Attended, Registered but absent, Never registered) | Each group | After the event, scheduled or with Send Now | Follow-up |
Who is in the audience
The audience is chosen on the Definition tab, under Audience: one or more contact segments, company segments and mailing lists. They are combined, and a person who appears twice is emailed once.
Every email is shown as a card: a preview of what guests receive, with Edit on it, and its buttons underneath.
How to put your brand on every email
One choice changes the look of all the emails of the event.
-
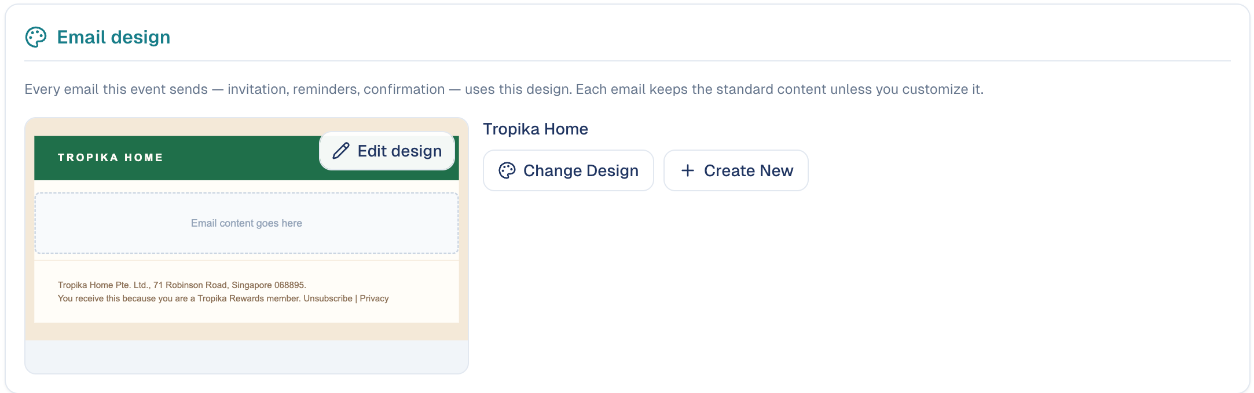
Open the Definition tab and scroll to Email design.
-
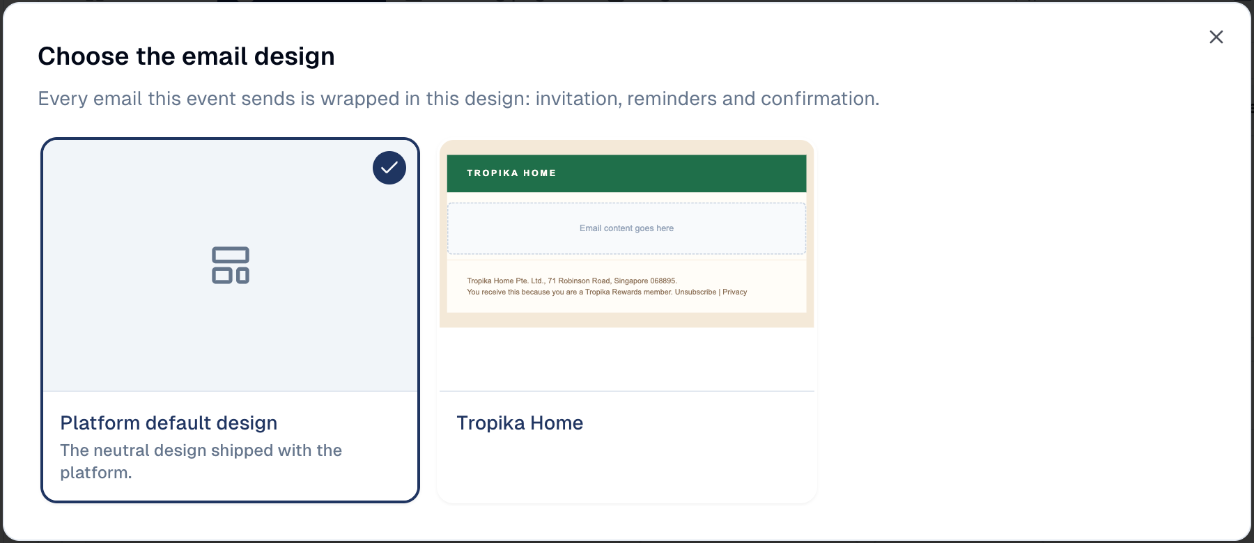
Choose Choose A Design and pick one of your designs.
-
The block now shows your design. Edit design opens it, Change Design picks another one, and Create New starts a new design.
Go back to Communications: every preview now sits inside your design.
A design is the frame, not the message
The design holds what is common to all your emails: the header with your logo, the colours, the footer with your address and the unsubscribe link. The message in the middle stays the standard one until you edit that email. The neutral platform design cannot be edited: create your own.
To also change who the emails come from, fill in Sender on the same tab: From Name, From Email and Reply-To Email. Left empty, the emails use your workspace's usual sender.
How to reword an email
-
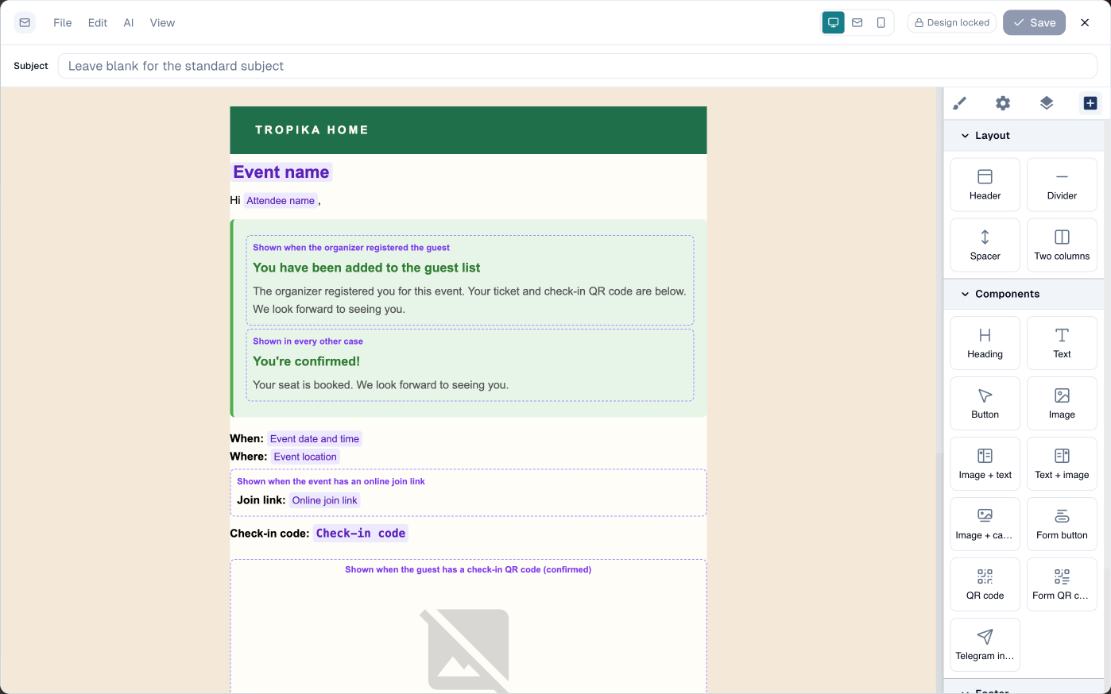
On the email's card, choose the preview or Edit. The editor opens.
-
Type a Subject, or leave it empty to keep the standard one.
- Double-click a text and change it.
- Choose Save, then close the editor. The card now says Your own version of this email. Reset to standard brings the original back.
Two things in the editor are special to event emails.
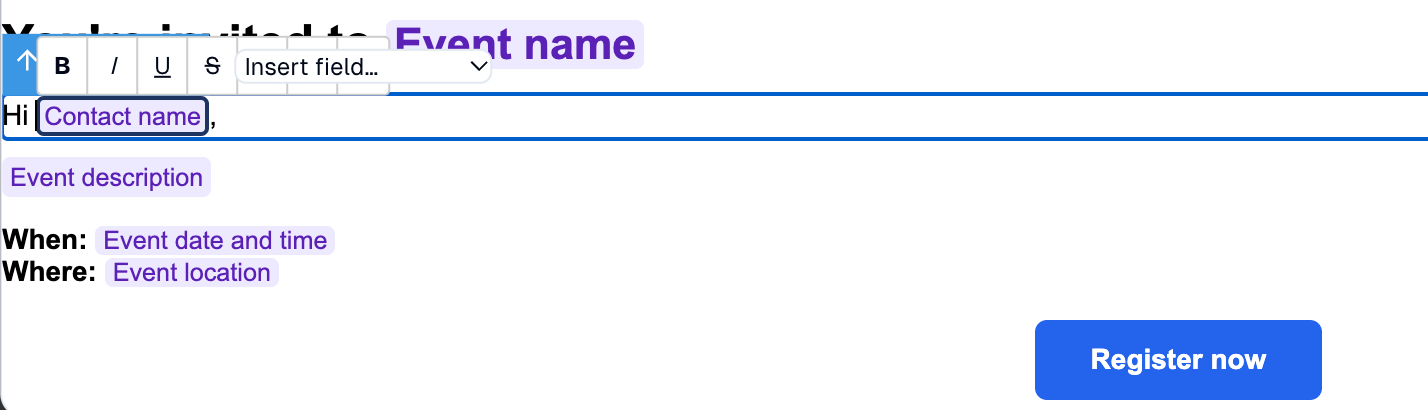
Purple chips are filled in for each guest when the email is sent: Event name, Attendee name, Event date and time. To add one, place your cursor in a text and pick it from Insert field… in the small toolbar.
| Field | Becomes |
|---|---|
| Event name, Event description | The name and short description from the Definition tab. |
| Event date and time, Event location | The date in the event's timezone, and the address or Online. |
| Contact name, Attendee name, First name, Last name | The person the email is sent to. |
| Registration link | The link to the event page, for the invitation. |
| Check-in code, Check-in QR code | What the guest shows at the door. |
| Online join link | The link to join an online event. Confirmed guests only. |
| Add to calendar link, Google Calendar link, Outlook link | Links that add the event to the guest's calendar. |
| Cancel link | The link a guest uses to cancel their registration. |
| Ticket type, Slot start, Slot end | The ticket or time slot the guest chose. |
| Survey link | The link to your post-event survey, in the follow-up emails. |
Purple dashed boxes are parts only some guests see. The title says who: Shown when the organizer registered the guest, Shown when the event has an online join link, Shown when the guest has a check-in QR code. Change the text inside; the box itself cannot be moved or deleted, so the email keeps working for every guest.
Do not type a field by hand
A chip is more than its text. Typing Event name in a sentence sends the words "Event name" to your guests. Always use Insert field….
The frame is locked on purpose
In the editor, Design locked means the header and footer come from the event's email design. Change them once, under Definition › Email design, and every email follows.
The View menu switches between Visual editor, HTML code and AI assistant, and Preview shows the email without the editing marks. See Editing an email.
How to send an email of your own instead
When rewording is not enough, replace an event email with one you built under Marketing → Emails: your layout, your images, your text.
- Build and save the email first. See Emails.
-
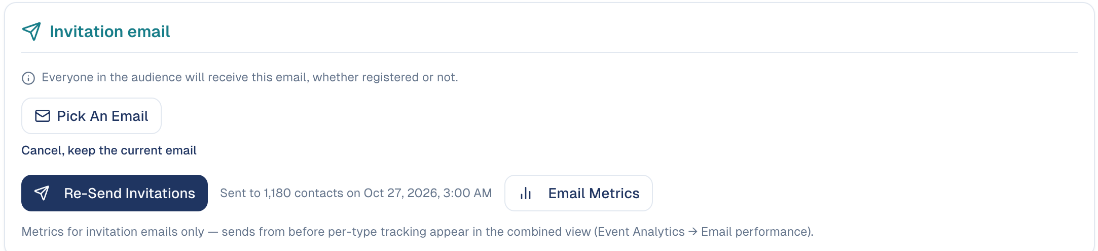
On the event, under the card of the email to replace, choose Use one of my emails instead. The card changes to a single button.
-
Choose Pick An Email, select your email, then Use This Email.
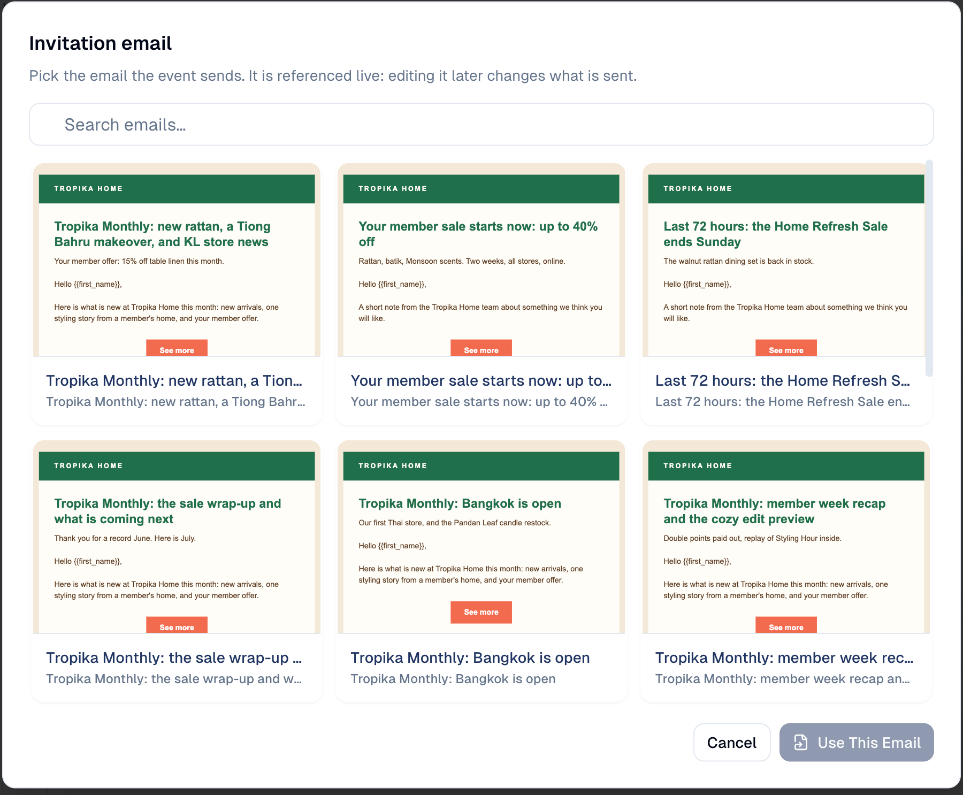
Changed your mind before picking? Choose Cancel, keep the current email.
Your email is used live
The event does not keep a copy: it sends your email as it is at the moment of the send. If you edit that email later under Emails, the event sends the new version.
An email of your own contains only what you put in it
The standard confirmation and reminders already carry the check-in QR code, the calendar links and the cancel link of each guest. For these, rewording the standard email is usually the safer choice. Replacing is best for the invitation and the follow-up, where the design matters most.
How to schedule reminders
On Communications, there are two kinds, each with its own emails.
- Registration reminders go to the people you invited who have not registered yet: seats are filling up.
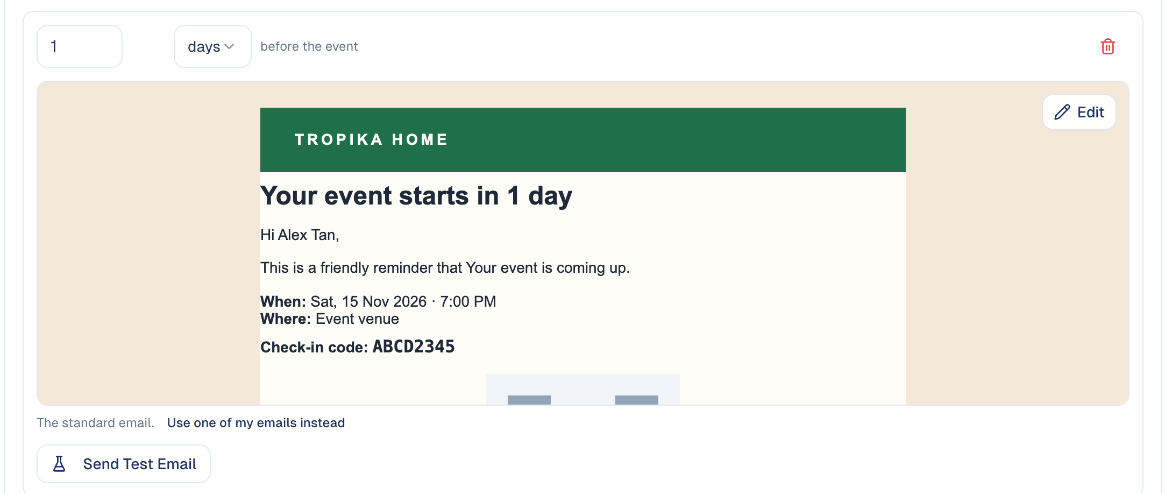
- Event reminders go to registered guests: your event starts in 1 day, with their check-in code.
Choose Add Reminder, then set how long before the event it goes out, in days or hours. Each reminder has its own card, so the email of the day before can say something different from the email of the last hour. The bin removes a reminder. Send Reminder Now sends one at once.
Registration emails
These are sent one guest at a time, automatically. Open Registration › Registration emails: the list shows the emails your event can send, and grows when you turn on Require Approval or the Waitlist.
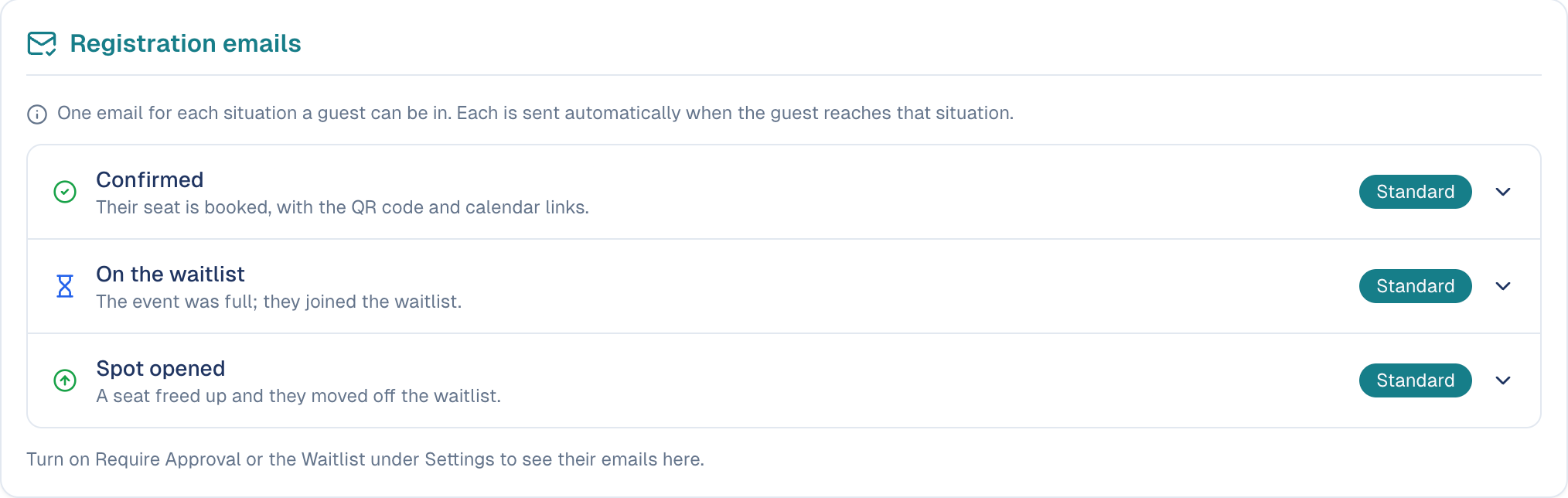
Open a line to see its preview, Edit it or replace it, exactly like the invitation. The label on the right says Standard until you change the email. For when each one is sent, see Registration emails.
Follow-up emails
The Follow-up tab has one email for each group, once the event is over:
- Attended: a thank-you to the guests who checked in.
- Registered but absent: sorry we missed you, to those who did not come.
- Never registered: to the people you invited who did not register.
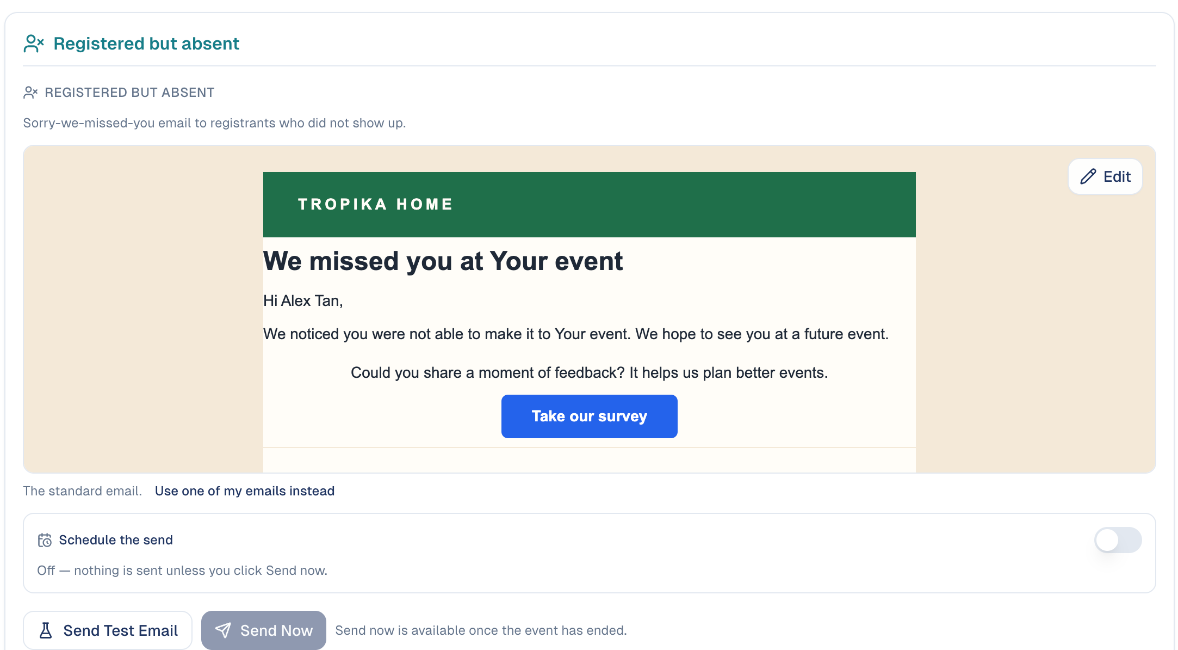
Follow-ups are never sent on their own
For each group, either switch on Schedule the send, or choose Send Now, which becomes available once the event has ended.
Ask for feedback while it is fresh
Under Post-event survey, at the top of the tab, attach a form (or choose New survey form). The follow-up emails then link to it through the Survey link field.
How to test an email
Every card has a Send Test Email button. It works at any time, even while the event is a draft.
- Choose Send Test Email. The address is filled in with yours; change it to send the test to a colleague.
- Choose Send Test, and read the email in that inbox, on a phone too.
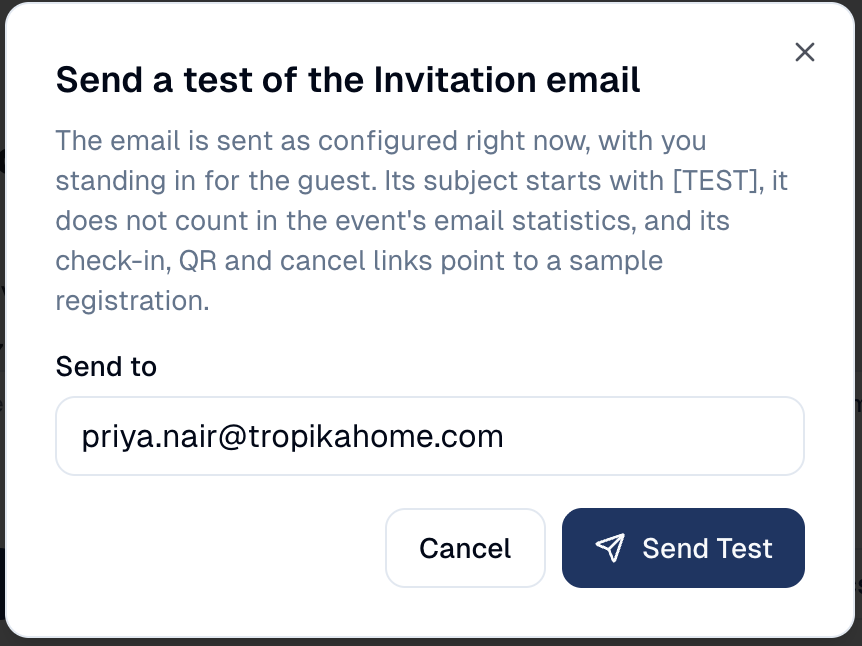
The test is the email as it is saved right now, with your name in place of the guest's. Its subject starts with [TEST], and it does not count in the email metrics.
The registration link in a test is real
Check-in, QR and cancel links in a test belong to a sample registration. The registration link of a test invitation is the real one: if you fill in the form, you are registered.
How to see what was sent
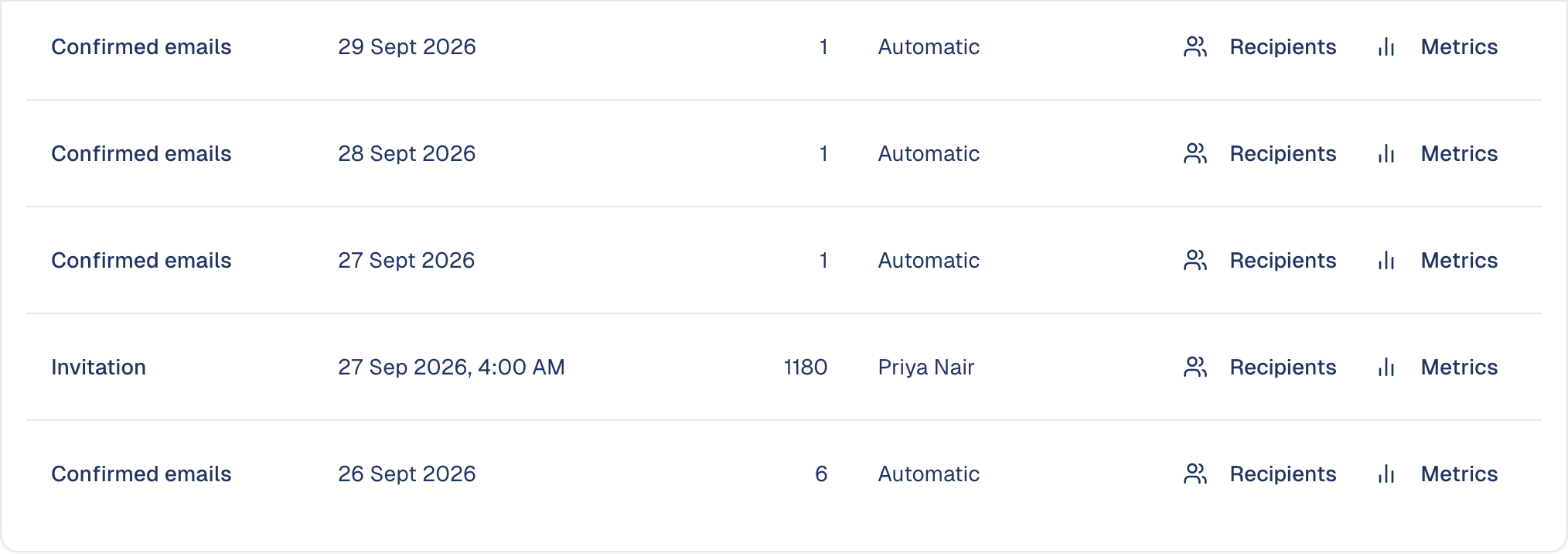
At the bottom of Communications, Sent emails lists every email the event has sent, with the time, the number of recipients and who sent it. Recipients shows who received a send, Metrics its opens and clicks.
Good to know
- Brand first, wording second. Choose the email design before you edit any email: you will then see each email as your guests do.
- Change event details on the Definition tab. The name, date and place in your emails are fields. Never type them into an email: they would be wrong the day the event moves.
- Test every email you changed. One test per email, to yourself, before the first real send.
- An edited email stops following the standard. If GoodBards improves a standard email later, your own version stays as you wrote it. Reset to standard takes the new one.
- Declined guests can stay unaware. With Require Approval on, you can turn the Declined email off.
Still stuck? Contact support.