Create a social post from scratch
Write one post yourself, by hand, save it as an asset, add it to a campaign and publish or schedule it. This is the quickest way to get a single post out when you already know what you want to say.
What it's for
Not every post needs a brief or an article behind it. A quick announcement, a reminder of a deadline, a reply to something in the news: you type it, check it in the network's preview, and send it. The post is still saved as an asset in your Content Repository and still goes out through a campaign, so its results count with the rest.
Before you start
- A connected account for the network you post to: LinkedIn, Facebook, Instagram, X or TikTok. See Connections. Without it, Publish and Schedule stay greyed out.
- A campaign with a tactic for that network, to publish from. If you have none yet, you can create one as you go (step 3).
1. Create the asset
- In the sidebar, choose Social Media → Social Post, then New Post.
-
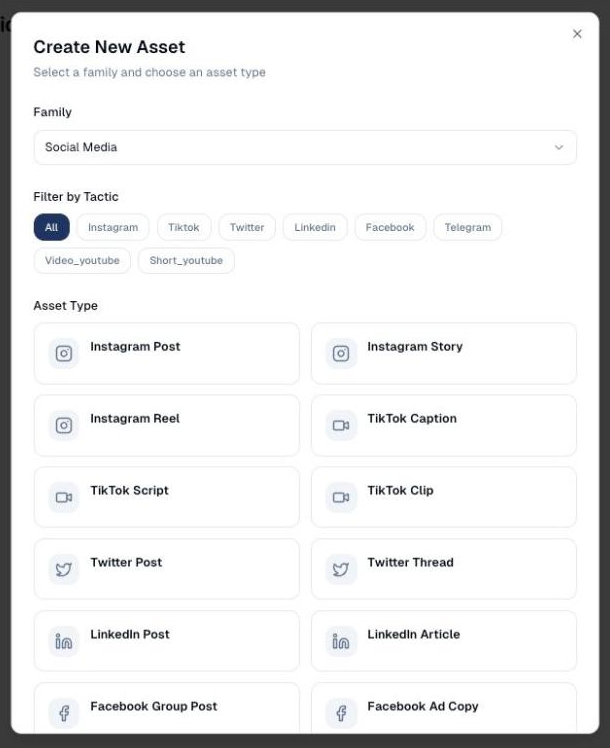
In Create New Asset, leave Family on Social Media and pick the Asset Type: for example LinkedIn Post, Instagram Post (images), Instagram Reel (video) or Facebook Post. Use Filter by Tactic to show one network only.
-
Choose Next.
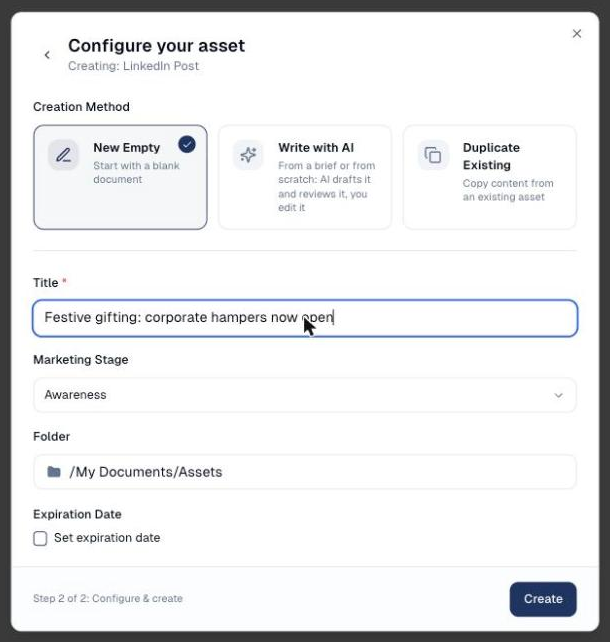
- Under Creation Method, keep New Empty. (Write with AI drafts the post for you; Duplicate Existing copies one of your posts. Both are covered in Social Post.)
-
Type a Title. It names the asset in your lists; it is not part of the post. Leave Marketing Stage and Folder as they are unless you sort your assets.
-
Choose Create. The post editor opens.
2. Write the post
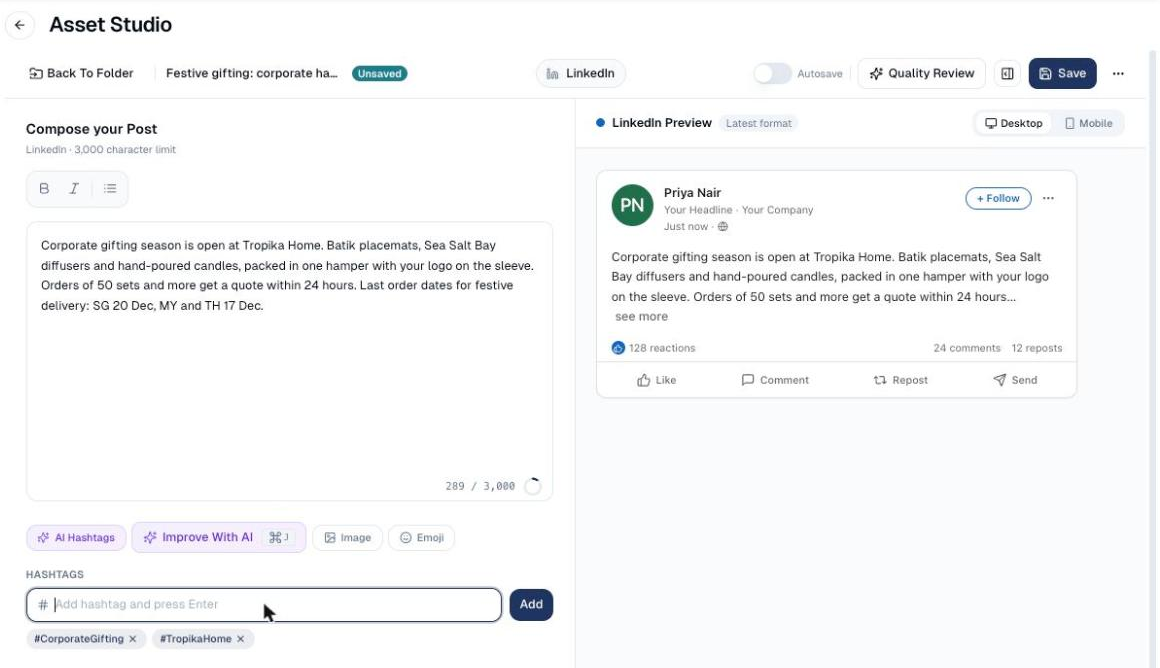
- Type your text under Compose your Post. The counter shows how much of the network's limit you have used, and the preview on the right shows the post as it will appear, on Desktop or Mobile.
- Add hashtags under Hashtags: type one and press Enter. AI Hashtags suggests some once the post has ten words.
-
Choose Image to attach a picture from your Content Repository, or Emoji to insert one. Improve With AI rewrites the post from an instruction (shorter, add a question at the end).
On LinkedIn, Insert → Video… or Insert → Document (PDF, PowerPoint, Word)… attaches a video or a document instead of a picture. For an Instagram Reel, pick the video first. See Videos, documents, Reels and stories.
-
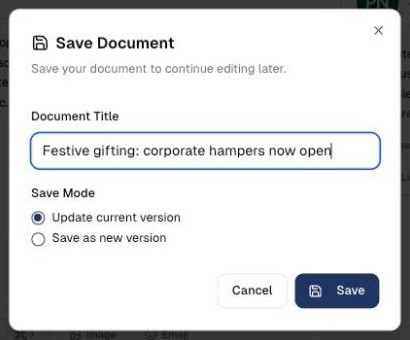
Choose Save at the top right. In Save Document, check the title and choose Save again.
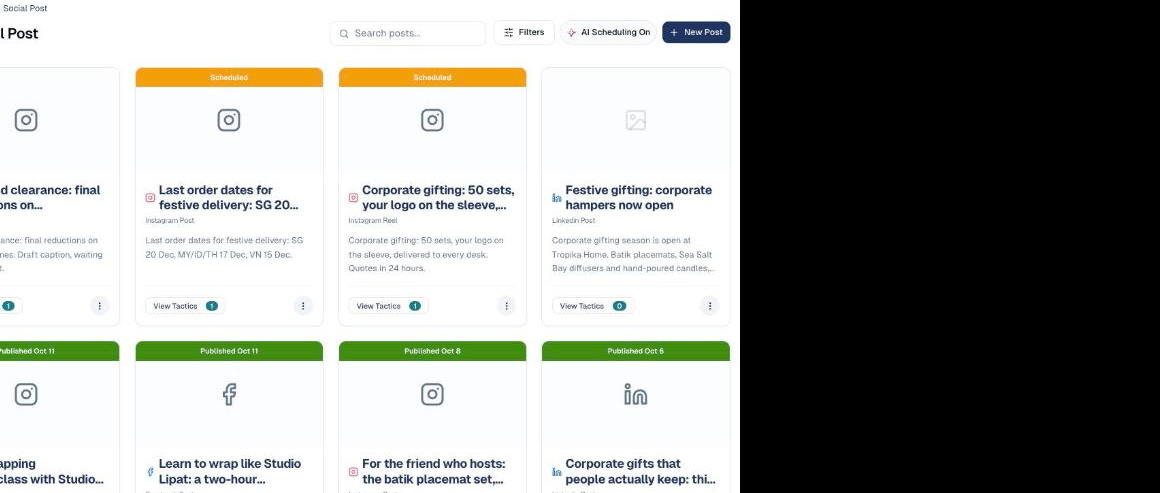
The message Asset created confirms it. Back on Social Post, your post is a card with View Tactics 0: it exists, but it is not attached to any campaign yet.
3. Add it to a campaign
- On the post's card, choose View Tactics, then Add To Tactic.
-
Keep Existing campaign, choose the campaign under Select campaign, then the tactic under Select tactic. Only tactics for the post's network are offered.
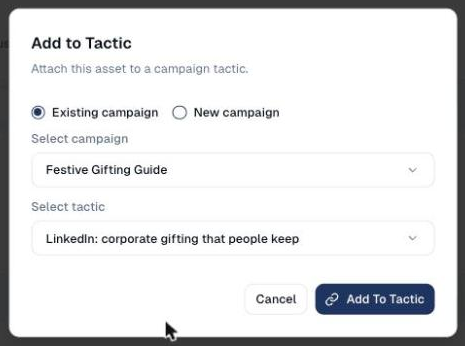
No campaign for it yet? Choose New campaign instead, give it a name and a marketing objective, and choose Create & Launch.
-
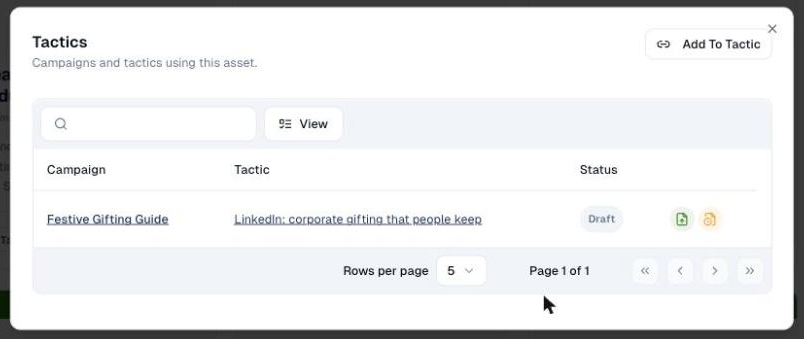
Choose Add To Tactic. The Tactics window now lists the campaign and tactic, with the post as Draft and two buttons on the row: Publish and Schedule.
4. Publish or schedule it
- Publish sends it now: choose the Destination (the page or account to post to) and confirm.
-
Schedule sends it later: pick a Date & Time, or choose Generate AI Recommendations for the best slots for your audience, then the Destination, then Confirm Schedule.
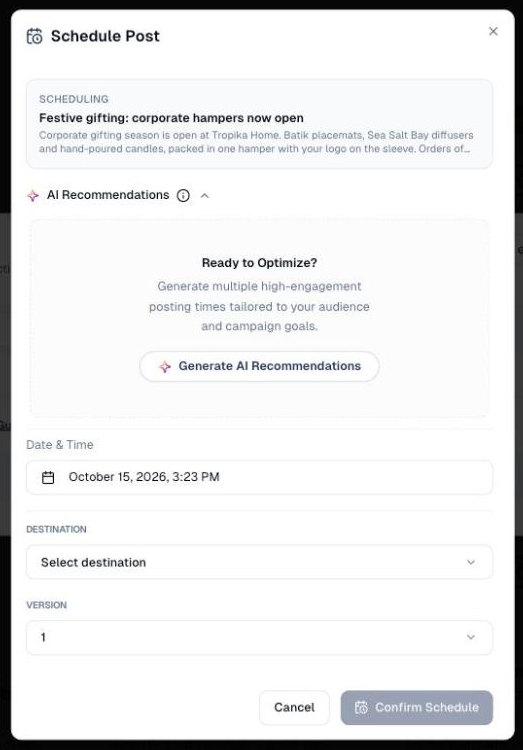
For Instagram, Publish as sets whether it goes out as a Post or a 24-hour Story.
The band on the post's card then reads Scheduled or Published with the date. A post with a video or a document shows Sending for a few minutes first, while the network processes the file.
Publish from the campaign
You can also publish or schedule from the campaign: open the tactic, and under Asset Management use the post's ⋮ menu.
Good to know
Save before you leave the editor
The editor does not save on its own unless you switch Autosave on at the top. Leaving with Unsaved on the title loses the post.
- One asset, one network. A LinkedIn post can only go to a LinkedIn tactic. For the same message on several networks, create one asset per network, or write them in one go with Write with AI or from an article: see Social Post.
- Character limits are per network: 3,000 on LinkedIn, 280 on X, 2,200 on Instagram and TikTok. The counter turns red past the limit.
- Instagram needs a picture or a video. A text-only Instagram post cannot be published.
Published posts are locked
You cannot edit or delete them from GoodBards once they are out.
Still stuck? Contact support.