Adding contacts
Bring people into your audience: one at a time, from a spreadsheet, or from a business card.
What it's for
Most contacts arrive on their own, from your forms, events and chatbot. The rest you add yourself: the list from a trade show, a client's customer file, the cards you collected at a meeting. Each way below creates proper contacts, with their consent and where they came from recorded.
Before you start
- The Access sensitive data permission. Without it, Add Contact and Bulk Add Contacts are greyed out. Importing also requires being an administrator. Ask an administrator to give it to you under Tenant Settings → Security; see Additional permissions.
- Your company's privacy statement, under Brand & Context → General Information → Privacy Statements. Every import is linked to the statement the people agreed to.
How to add one contact
- In the sidebar, choose Audience → Contacts.
-
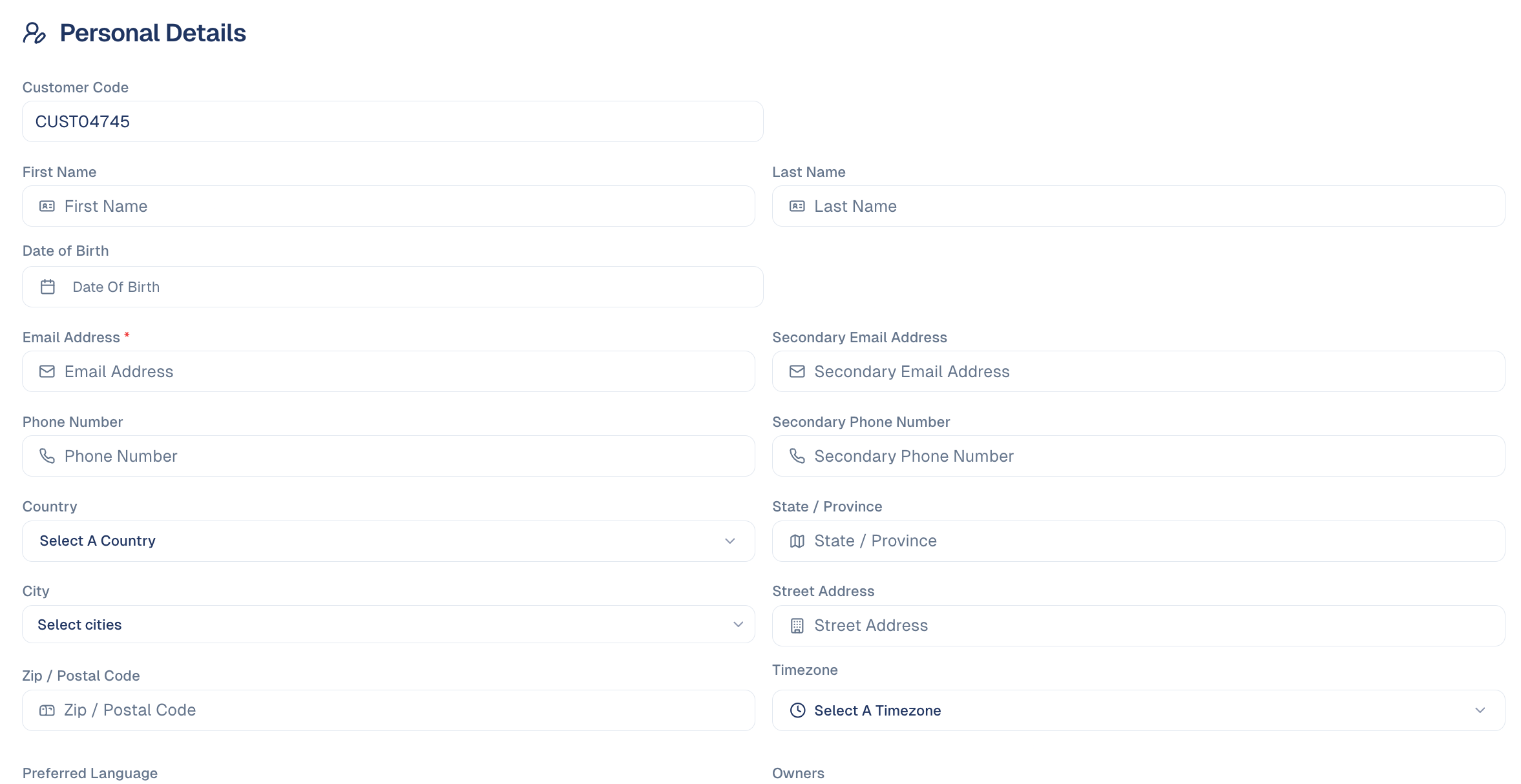
On the Details List tab, choose Add Contact and fill in the form. Only the Email Address is required; the Customer Code is filled in for you.
How to import a spreadsheet
Only import people who agreed to hear from you
Set the Default Status to match what they agreed to: choose Subscribed only for people who gave marketing consent. Under Singapore's PDPA and similar laws, consent cannot be assumed.
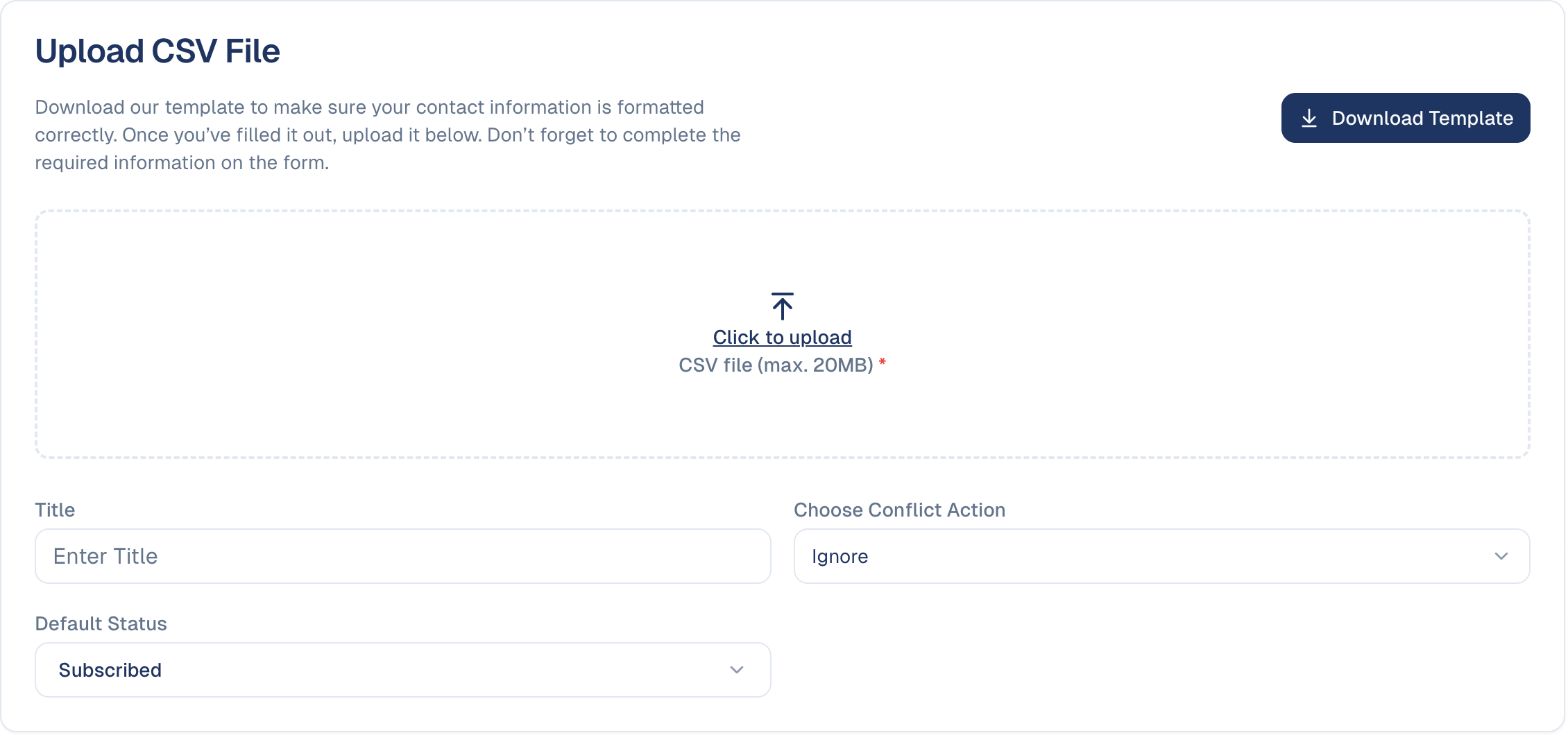
- In the sidebar, choose Audience → Contacts, open the Import Jobs tab, then choose Bulk Add Contacts → From a CSV file.
- Choose Download Template and put your contacts in it, one per row. The columns and the values they accept are explained in Contacts → Prepare your CSV file.
-
Upload the file, give the import a Title, and choose:
- Choose Conflict Action: what to do when an email address already exists (for example Ignore it).
- Default Status: the status of the imported contacts.
-
Under Additional Details, say where the contacts come from (a campaign and tactic, or another source), add Tags and Owners, and pick the Privacy Statement they agreed to. Choose Upload.
- The job appears on the Import Jobs tab as READY TO START. Check the job, then choose Start and confirm with Start import.
- When the job shows COMPLETED, your contacts are in. If it shows INCOMPLETE, open it with View and choose Download logs to see which rows were rejected and why. See Import Jobs.
Nothing is imported until you choose Start
Uploading only creates the job, so you can check it before any contact is added.
How to import from Pipedrive
Once Pipedrive is connected (see Pipedrive), Bulk Add Contacts → From Pipedrive imports your Pipedrive contacts directly, with the same choices as a spreadsheet: conflict action, default status, tags and privacy statement. Until Pipedrive is connected, the option shows as Not connected.
How to scan a business card
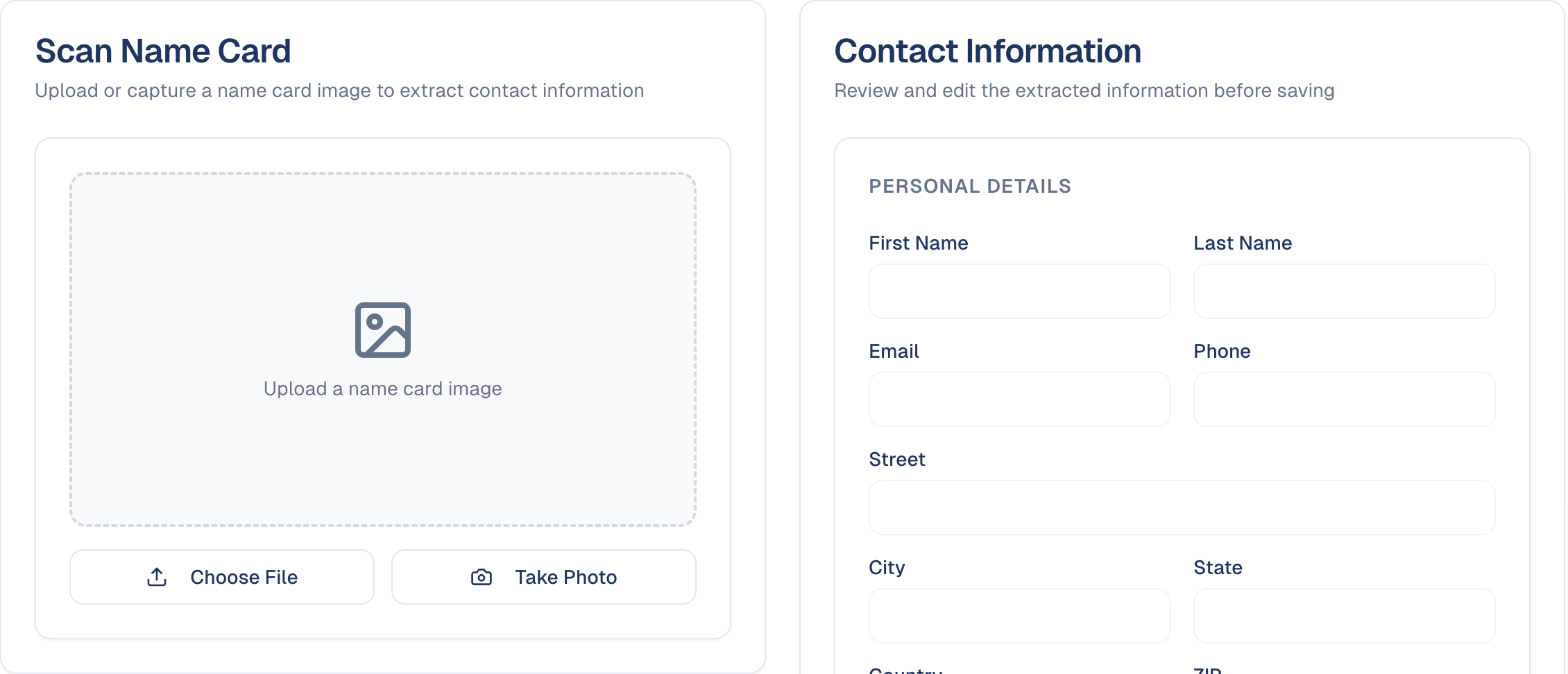
- In the sidebar, choose Audience → Contacts, then the Card Scanner tab.
- Choose Take Photo, or Choose File for a picture you already have.
- GoodBards reads the card and fills in the Contact Information. Check it, correct anything misread, and save.
Good to know
- The conflict action handles existing contacts. It decides what happens to a row whose contact is already in your audience.
Tag every import
A tag such as trade-show-2026 lets you find, segment and follow up that
group later.
Still stuck? Contact support.